Google Analytics With SvelteKit
Published May 18, 2022
Table of Contents
Set Up Google Analytics
In this post you’re going to learn how to set up Google Analytics and create a <Analytics /> component you can use in SvelteKit.
⚠️ The post uses code snippets from Google Analytics which might cause some ad blockers to block resources on the page such as the images.
If you go to the Google developers section for Google Analytics and select “Set up Google Analytics” and then select “Websites and web apps” it leads you to the Introduction to Google Analytics 4 page.
From the Get started with Google Analytics introduction you have to go to Set up Analytics for a website and/or app.
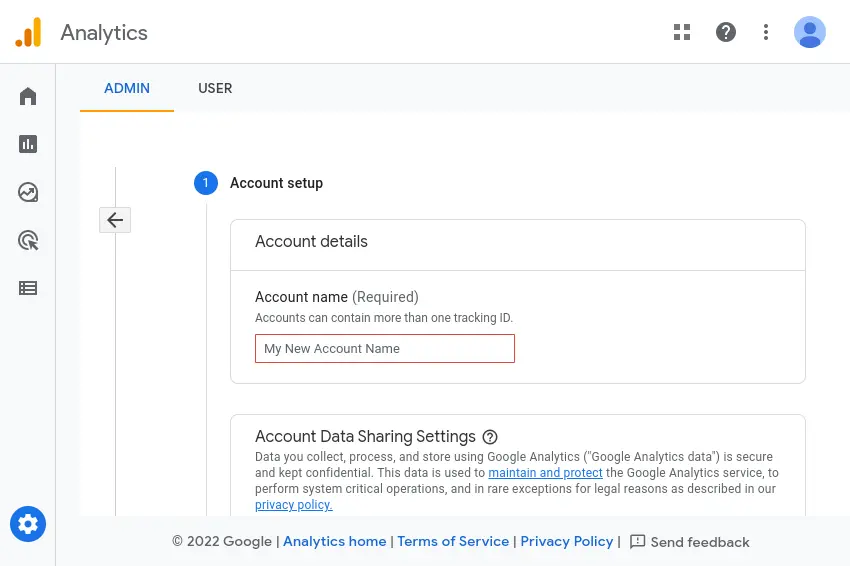
1. Create an Analytics account by going to Admin in Google Analytics and clicking Create Account and fill out the fields.
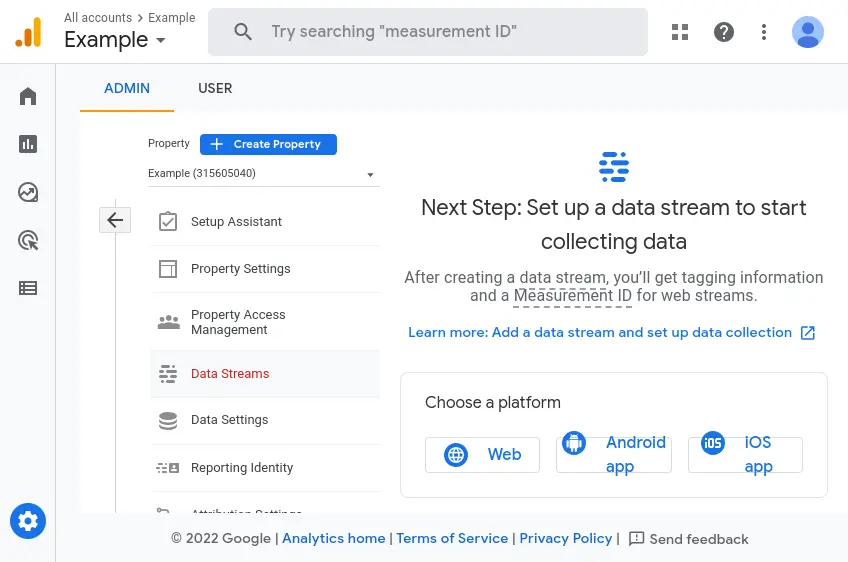
2. After you signed away your soul to Google it’s going to prompt you to add a data stream which you can always find in the column on the left when you get lost.
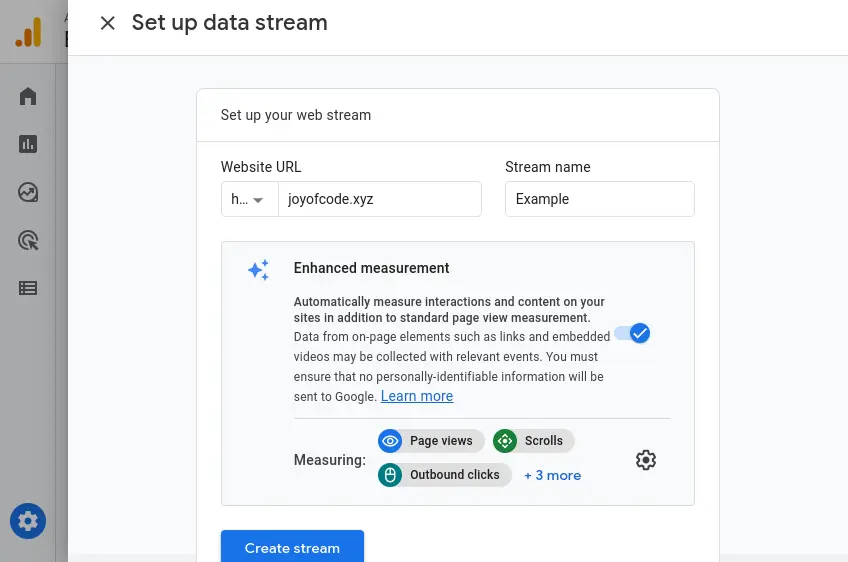
3. After you select the Web as the platform the data stream is going to give you a public Measurement ID to use for tracking, so you don’t have to worry about leaking it.
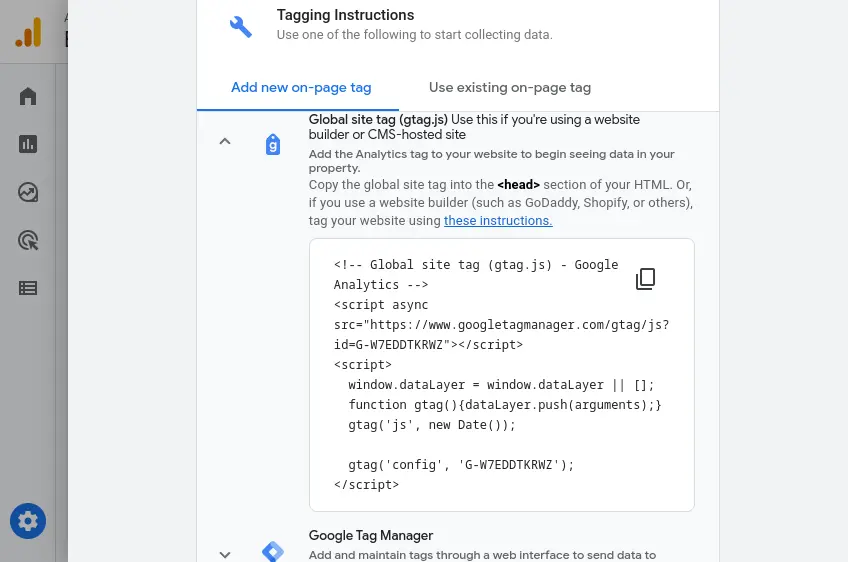
4. You’re going to find your Measurement ID in Web stream details alongside instructions on how to include Google Analytics on your site under Tagging Instructions.
The Measure views section on the Google developers page has more information on how to track views that’s of interest.
I’m describing these steps in detail because I want you to understand how I find this information.
Create The Analytics Component
After you get the Measurement ID from Google Analytics create a simple <Analytics /> component you can use inside a layout.
⚠️ You might not need the reactive statement because by default Google Analytics is going to count the page view when the browser history changes.
<script lang="ts">
  import { page } from '$app/stores'

  $: {
    if (typeof gtag !== 'undefined') {
      gtag('config', 'MEASUREMENT_ID', {
        page_title: document.title,
        page_path: $page.url.pathname,
      })
    }
  }
</script>

<svelte:head>
  <script
    async
    src="https://www.googletagmanager.com/gtag/js?id=MEASUREMENT_ID">
  </script>
  <script>
    window.dataLayer = window.dataLayer || []

    function gtag() {
      dataLayer.push(arguments)
    }

    gtag('js', new Date())
    gtag('config', 'MEASUREMENT_ID')
  </script>
</svelte:head>
Optional step is to install the type definitions for gtag.js with npm i -D @types/gtag.js
This is how you can measure information such as the page title and page path using the SvelteKit store.
Because it’s using a store value whenever the page gets updated inside the $: { ... } reactive block we can submit the new page view if gtag exists on window meaning it’s inside the browser context.
🐿️ The curly boys inside the reactive block are optional but make the code easier to read as
$: if ...works the same.
Include the <Analytics /> component inside your main layout __layout.svelte making it available on every page.
<script lang="ts">
  import Analytics from '$lib/analytics.svelte'
</script>

<Analytics />

<slot />
That’s it! 🎉
⚠️ If you’re using an ad blocker you’re going to see the net::ERR_BLOCKED_BY_CLIENT error in your console as it gets blocked by those extensions — so if you have a tech savvy audience you might want to look into other options.
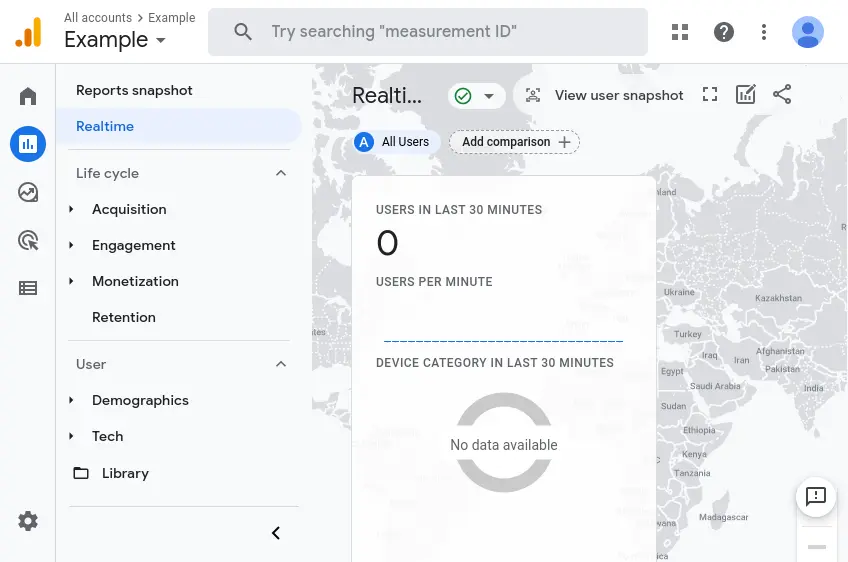
You should start receiving data in the next 30 minutes if you go to Reports under Realtime inside Google Analytics.
If performance is a concern you can use Partytown to run third-party scripts from a web worker.
Using Google Analytics is mostly about cost and convenience but if you don’t have to use it consider trying umami that’s a lighter alternative.
Thanks for reading! 🏄️