Full Stack SvelteKit For Beginners
Published Feb 28, 2022
Table of Contents
- This Series Is No Longer Updated
- Introduction
- What is SvelteKit?
- Why SvelteKit?
- SvelteKit Tour
- Setting Up Prisma
- Landing Page Layout
- Home Layout
- Showing Tweets
- Compose Tweet
- Removing Tweets
- Liking a Tweet
- User Profile Page
- Linking to a Tweet
- Settings Page
- About Page
- Progressive Enhancement
- Prefetching
- Page Transitions
- Cleaning Up Endpoints
- Conclusion
This Series Is No Longer Updated
Since the breaking SvelteKit changes it’s not possible to update the post without a complete rewrite.
This series is not being updated in favor of the Learn SvelteKit series I’m working on writing and releasing on YouTube.
In the future I might revisit the idea of creating a Twitter clone in SvelteKit but until then you can enjoy the Learn SvelteKit series.
Introduction
You’re going to make Twittr — a social media site for sharing hot takes.
Here are the finished project files.
There you can find the assets for the project but you can use your images if you want.
Let’s dive into it! 🐬
What is SvelteKit?
SvelteKit is an opinionated full stack framework that ties the frontend and backend together delivering the best developer and user experience.

SvelteKit is made by @rich_harris and a group of amazing contributors.
In simplest terms — SvelteKit does all the boring stuff for you and empowers you to build amazing things.
This isn’t just true for SvelteKit but all the other meta-frameworks you might have heard of such as Next.js that’s built on top of React or Nuxt.js built on top of Vue.
🐿️ A meta-framework is just a term used to describe a framework that’s built on top of another framework.
Why do we need these frameworks and what does it even mean to be a “meta-framework”?
Despite the jokes about a new JavaScript framework being released each day we as developers have come together and decided that the component model is the best way moving forwards.
Right now we’re in the era of meta-frameworks and tackling other problems around frontend such as tooling instead of reinventing how we build user interfaces where React’s model of components already won years ago.
If you’re not familiar with frontend development I made Svelte For Beginners so you understand what problems frontend JavaScript frameworks solve compared to just writing plain HTML, CSS, and JavaScript.
To understand the problems meta-frameworks like SvelteKit solve we need to go back and understand how traditional single page application frameworks like Svelte and React work.
Why SvelteKit?
I made a simple Svelte example site with a Pokémon search together with a couple of pages (the code is irrelevant so ignore it).
You can press “open the preview in new window” button if you want to follow along.
Everything you see on the page like the content changing and navigation is done by JavaScript.
This is normal to most people who started web development in recent years. In the past if you used a server-side language like PHP this wouldn’t be possible because a server would have to create the page and send you the HTML over the wire and then you would sprinkle JavaScript using something like jQuery.
The reason frontend JavaScript frameworks exist is because we want that nice user experience and feedback when you’re entering a form and app-like feel navigating pages without having to refresh the page (think of Gmail) but it comes at a cost.
If you disable JavaScript or it fails to load for whatever reason all you have is a blank page.
What happens when the page loads? The default Pokémon it fetches is Pikachu so press Ctrl + Shift + I to open the developer tools.
If you inspect the elements on the page inside the elements tab the fetched Pokémon is right there.
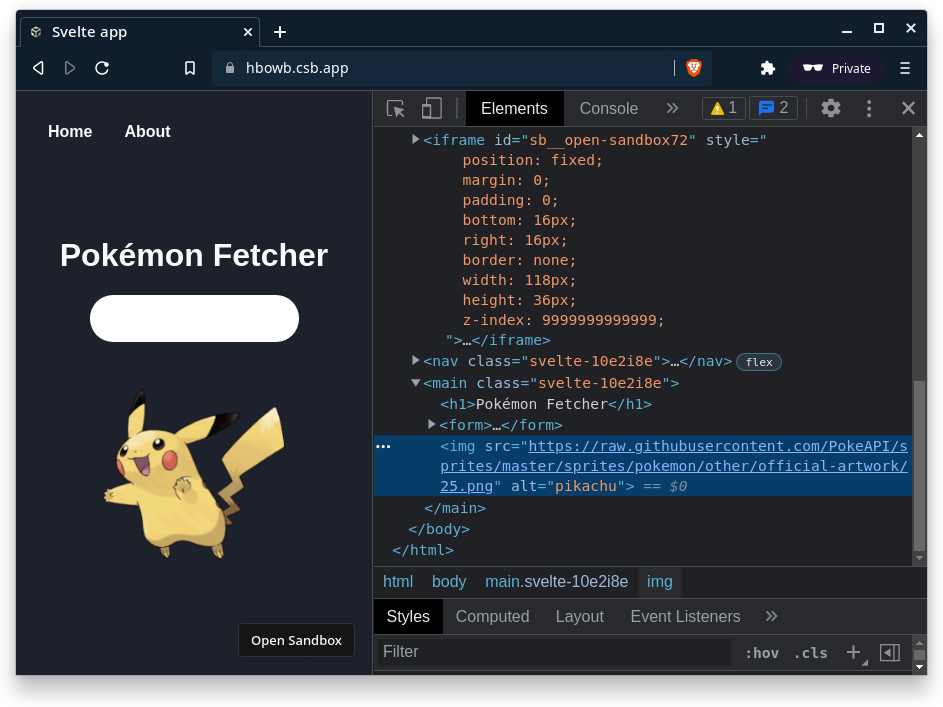
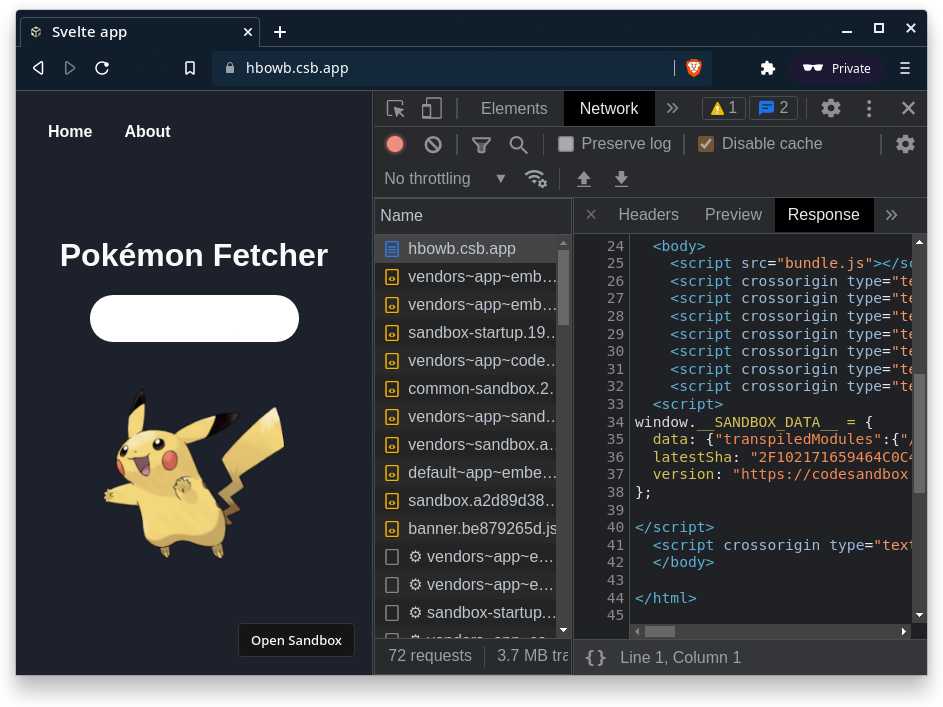
If you look at the response when you load the page inside the network tab (refresh the page) or view page source it’s just a HTML shell that you query using JavaScript and attach the Svelte app onto.
🐿️ This means when a bot tries to index your site unless it can execute the JavaScript it’s like nothing is there.
Try searching for “charizard” (press Enter to submit the form) and you can see a fetch API request has been made and Svelte updates the user interface but we’re still using the same index.html file.
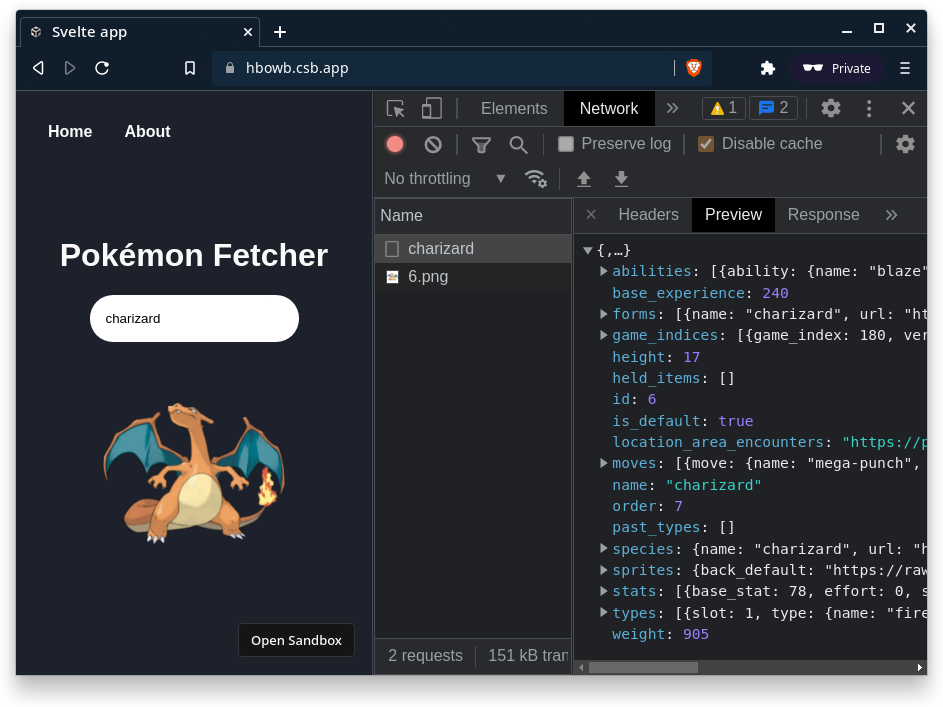
This might be alright for a dashboard where we don’t care about indexing pages for search engine optimization but most sites do and using any secrets like user authentication is where things start to become hard.
There’s a couple of problems with single page applications:
- The SEO suffers because it’s not using server-side rendering or prerendering to static pages
- Requires a separate backend if we want to do anything like having to send a secret to an API
- Doesn’t work without JavaScript
- The large JavaScript bundle could be the single point of failure when loading the page
- You have to decide how to ship your code to users
Let’s do a mental exercise. Stick with me!
You could build your own full stack framework if we look at the Svelte documentation for SSR and figure out how to server-render a component and hydrate it on the client.
🐿️ Hydration is a term that means adding JavaScript to the page after the server builds and hands you the HTML page. The page is “dry” so you “hydrate” it. 🤭
You also want a nice developer experience and a fast development server that instantly updates when you make a change and can resolve dependencies and bundle your code so you decide to use Vite.
Easy! 😏 You only need…
- File based routing
- Figure out how to server-render a component
- Hydrate the component so the JavaScript works
- Make server-side rendering and prerendering work
- Code splitting which means only loading the assets that are required per page
- The Fetch API at the time of writing this only works in the browser so we need to polyfill it if we want to use it on the server
- Figure out how to use client-side navigation so we keep the great user experience
- Use data prefetching when a user hovers over a link so the content is loaded before they visit the page
- It would be nice to also have TypeScript, ESLint, Prettier configured
- Figure out how to deploy our full stack project to anywhere
- …
That would be a complete nightmare! 😱 I wouldn’t even know where to begin to be frank with you. You don’t have to either — SvelteKit has already done the hard work for us.
In fact we can have the best of both worlds using server-side rendering and client-side navigation without page refresh.
If you want you can even prerender every page or only do it for ones that don’t change like the about page so they don’t even need to ship JavaScript. 🤯
SvelteKit uses the web platform Request and Response objects of the Fetch API so it’s not tied to any environment but uses adapters that generate the output required for the target platform without configuration.
🐿️ Fetch provides a generic definition of
RequestandResponseobjects. This will allow them to be used wherever they are needed in the future, whether it’s for service workers, Cache API, and other similar things that handle or modify requests and responses.
This just means that you can spend more time on MDN learning about web fundamentals and improve as a web developer instead of just learning a framework abstraction.
SvelteKit and Next.js let you prerender your site meaning all your pages are built in advance but have endpoints like I’m using for subscribing to the newsletter thanks to serverless functions that give you a sip of server-side JavaScript only when you need it when hosted on services like Netlify and Vercel that have a generous free tier (the site you’re on only costs me time and paying for the domain name).
Because we’re using a full stack framework we can create endpoints that correspond to HTTP request methods such as GET and POST same as using a backend framework like Express.
For the example to work you need to allow cookies.
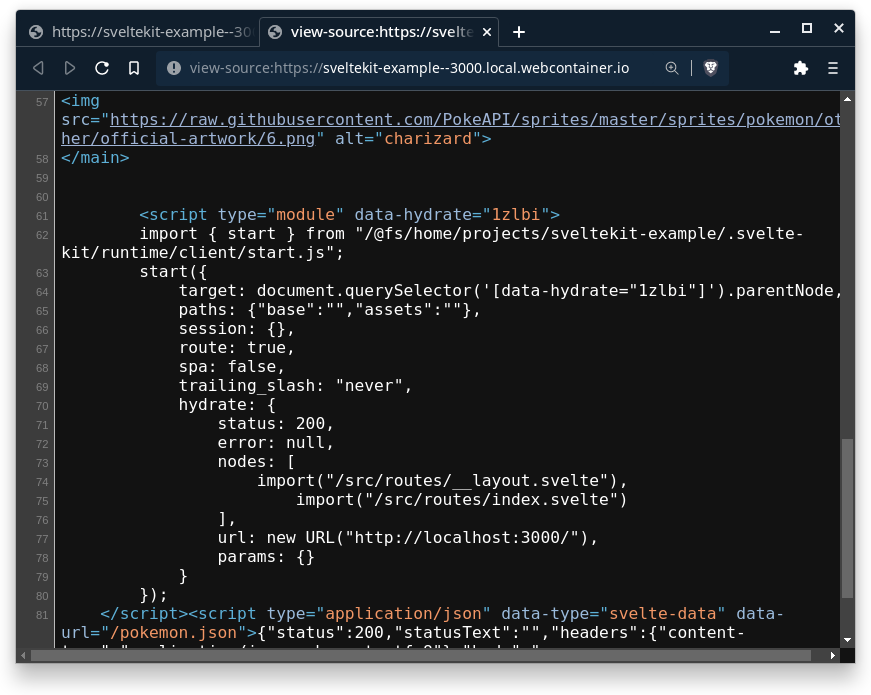
Here is the same example but using SvelteKit if you want to try it out. It’s using a real Node.js environment thanks to WebContainers. 🤯
I’m going to explain how everything works later when we start diving into SvelteKit so don’t worry. That being said I encourage you to explore!
Instead of using a fetch request on the client the form sends the Pokémon the user typed in to the site.com/pokemon.json endpoint using POST and updates the pokemon on the server. The load function also runs on the server so we can do a GET request to the same endpoint that just returns the pokemon.
The only thing that changed is that the computation moved from the frontend to the backend.
This might be hard to wrap your head around at first — I know it was for me!
Open the page inside a new window and navigate to the network tab inside your developer tools. Disable JavaScript by pressing Ctrl + P and type > javascript until you see the option to run the command “Disable JavaScript” (you can enable it the same way later).
Try refreshing the page and enter a Pokémon.
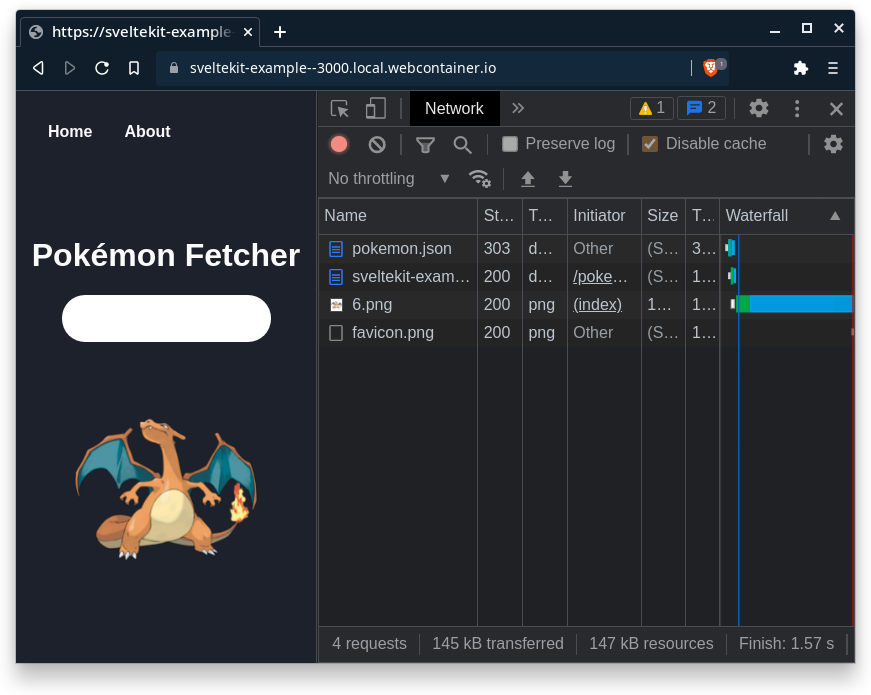
You can see the page refresh if you look at the favicon at the top left. There’s no JavaScript! 🤯
If you look at the response or view the page source the HTML generated from the server is right there! You can see how the page is being hydrated.
Over the years we forgot how basic things like forms work and started to rely on JavaScript for everything but now we can have the best of both of worlds using progressive enhancement.
The point is not that your site should work without JavaScript but before JavaScript.
I’m going to show you later how you can progressively enhance forms to use the Fetch API when JavaScript is available.
Keep in mind it’s using server-side rendering but also has client-side navigation because once the page is rendered it turns into a single page application.
Since the about page doesn’t have any interactivity you don’t have to ship any JavaScript so you can specify it should be prerendered and disable hydration for production.
Meta-frameworks like SvelteKit blur the line between frontend and backend which is great because you don’t even realize you’re a full stack developer.
🐿️ You might wonder when to use Svelte or Sveltekit but always use SvelteKit because it’s opinionated.
There’s a lot more to learn about SvelteKit but first let me give you a tour of SvelteKit.
SvelteKit Tour
You should have Node.js installed. A basic understanding of JavaScript and Svelte helps - I made SvelteKit For Beginners that teaches you Svelte through JavaScript and answers what problems JavaScript frameworks solve.
For the editor I’m using Visual Studio Code but you use what you prefer. If you’re on a potato 🥔 you can try StackBlitz at no cost. Sign in with GitHub and select the SvelteKit project.
🐿️ At the time of writing this post SvelteKit is near its 1.0 release so there shouldn’t be breaking changes but always practice reading the documentation.
🖌️ Let’s start a fresh SvelteKit project!
npm init svelte@next🖌️ Select the barebones “skeleton project”. I opted for “yes” for other options except the last one for testing.
I’m going to use TypeScript but it’s optional! You can ignore the types if you want.
✔ Where should we create your project?
  (leave blank to use current directory) … .
✔ Which Svelte app template? › Skeleton project
✔ Add type checking with TypeScript? › Yes, using TypeScript syntax
✔ Add ESLint for code linting? … No / [Yes]
✔ Add Prettier for code formatting? … No / [Yes]
✔ Add Playwright for browser testing? … [No] / Yes
🐿️ ESLint is like a spellchecker for your code and Prettier helps you format your code so it’s neat and tidy.
🖌️ Don’t forget to install the dependencies after which you can start the development server at http://localhost:3000/.
⚠️ The port might be different in the latest version of SvelteKit but I changed it to
"dev": "vite dev --port 3000"for consistency.
npm i && npm run devLet this simmer for a bit while we explore the file structure.
.
├── .svelte-kit
├── src
│   ├── app.d.ts
│   ├── app.html
│   └── routes
│       └── index.svelte
├── static
│   └── favicon.png
├── package.json
├── svelte.config.js
├── tsconfig.json
└── vite.config.js
.svelte-kit
Holds what makes SvelteKit work and the output of your project. For example .svelte-kit/runtime/components holds the template for the error.svelte and layout.svelte components you’re going to see later.
src
Is where your’re going to store code you write:
app.d.tsare just some type definitons for SvelteKitapp.htmlis going to be used as a template for your pages where the%placeholder%is so you shouldn’t change thisroutesare the pages in your project because at the heart of SvelteKit is a filesystem-based router so for example if you createabout.svelteit maps to the/aboutroute
static
Great for static assets such as a favicon or images you might have and they’re served from the root like /favicon.png.
package.json
Includes some scripts for running the development server and building and previewing our project alongside some development dependencies that aren’t important.
I want you to note "type": "module" that means we’re using ES modules (import thing from 'thing' syntax which you don’t have to think about right now but it’s good to know 😅).
svelte.config.js
SvelteKit config where you can add preprocessors, adapters and change Kit options.
tsconfig.json
The config for the TypeScript compiler that’s already set up for you.
vite.config.js
Vite config where you can add Vite plugins and configure Vite.
There’s some other unimportant configuration files you’re not going to touch besides .gitignore and .prettierrc.
🐿️ Don’t be afraid to poke around files and folders. It might surprise you what you can learn even if you don’t understand the code.
Phew! That’s it for this episode of SvelteKit cribs.
Setting Up Prisma
How many hours have you wasted trying to set up a database for a tutorial? It gives me anxiety because it always goes wrong and it’s crap I don’t care about. This isn’t that kind of tutorial.
Prisma is a library that lets you write JavaScript instead of raw SQL for interacting with a database and it generates types for you. It’s a joy! 😍
This is a Prisma schema.
model User {
  id      Int      @id @default(autoincrement())
  email   String   @unique
  name    String?
}
Generated SQL.
CREATE TABLE "User" (
  "id" SERIAL,
  "email" TEXT NOT NULL,
  "name" TEXT,
  PRIMARY KEY ("id")
);
I’m going to be honest here — I don’t even know SQL and you don’t have to. This empowers you as a developer to do more.
We’re going to use a SQLite database that’s just a regular file so we don’t have to set up anything. Later if you decide to use another SQL database you simply change the config and that’s it.
If you want syntax highlighting and formatting you can get the Prisma VS Code extension and to format on save using Prettier you can add this rule to your VS Code settings (you have to enable “format on save” in your settings).
"[prisma]": {
  "editor.defaultFormatter": "Prisma.prisma"
}
🖌️ Let’s initialize Prisma.
npx prisma init --datasource-provider sqlite✔ Your Prisma schema was created at prisma/schema.prisma
You can now open it in your favorite editor.This is going to create a prisma folder and set up the SQLite config for you. Inside the generated .env file is the DATABASE_URL you can change in the future.
That’s right, you already have a database! 🤯
🐿️
npxlets you use a package without having to do a global install. The binaries are located innode_modules/.binwhere you can also findsvelte-kit. You can runnpx prismato see the CLI options.
🖌️ Open schema.prisma and let’s create our schema! You can ignore the config at the top.
schema.prisma
generator client {
  provider = "prisma-client-js"
}

datasource db {
  provider = "sqlite"
  url      = env("DATABASE_URL")
}

model Tweet {
  id      Int      @id @default(autoincrement())
  url     String
  posted  DateTime
  content String
  likes   Int
  user    User     @relation(fields: [userId], references: [id])
  userId  Int
}

model User {
  id     Int     @id @default(autoincrement())
  email  String  @unique
  handle String  @unique
  name   String
  avatar String
  about  String
  tweets Tweet[]
  liked  Liked[]
}

model Liked {
  id      Int  @id @default(autoincrement())
  tweetId Int  @unique
  user    User @relation(fields: [userId], references: [id])
  userId  Int
}
In the schema you’re creating the Tweet, User and Liked tables. The tweets are linked to the User table by using @relation where the userId field matches the id field of Tweet. In the same way the Liked table references the User so we can know what tweets they liked.
🖌️ The last step is to install the Prisma Client which generates the client and types you can use.
npm i @prisma/client🖌️ Create the database from the schema.
npx prisma db pushSQLite database dev.db created at file:./dev.db
🚀 Your database is now in sync with your schema. Done in 129ms
✔ Generated Prisma Client in 78msThat’s it! 😄
🐿️ If
npx prisma db pushfails at generating try installing the Prisma CLI withnpm i -D prismaand run it again.
This creates a dev.db file that’s our SQLite database.
If you ever want to start fresh you can simply delete dev.db and run the same command.
🐿️
db pushis great for prototyping but usemigrate devin a real project to create a history of your database when you make any change.
🖌️ It’s a great idea to .gitignore any generated file but our database could contain sensitive information.
.DS_Store
node_modules
/build
/.svelte-kit
/package
.env
.env.*
!.env.example
dev.db
You can read the exemplary Prisma documentation if you want to learn more and Prisma’s Data Guide to learn basics of databases.
Another awesome thing about Prisma is Prisma Studio. You can open it with npx prisma studio if you want a graphical user interface to explore your data. It gives me phpMyAdmin vibes!
I could leave it here but I want to show you how to 🌱 seed a database or populate it with data which is purely optional.
🖌️ Inside prisma create seed.ts.
seed.ts
import PrismaClientPkg from '@prisma/client'
// Prisma doesn't support ES Modules so we have to do this
const PrismaClient = PrismaClientPkg.PrismaClient
const prisma = new PrismaClient()
export function randomUrl(): string {
return Math.random().toString(16).slice(2)
}
// gets random time starting from now and
// going back one day whenever you seed the
// database in the future
export function randomDate(): string {
// this is set to one day
const offset = 24 * 60 * 60 * 1000 * 1
const current = new Date().getTime()
const random = Math.random() * offset
const difference = new Date(current - random)
return difference.toISOString()
}
function getUsers() {
return [
{
name: 'matia',
handle: '@joyofcodedev',
email: 'matia@example.test',
avatar: '/profile/matia/avatar.webp',
about: 'Likes long walks on the beach. 😘',
tweets: {
create: [
{
url: randomUrl(),
posted: randomDate(),
content: `SvelteKit is lit. 🔥`,
likes: 10
},
{
url: randomUrl(),
posted: randomDate(),
content: `I love Svelte! ❤️`,
likes: 24
},
{
url: randomUrl(),
posted: randomDate(),
content: `Sometimes when I'm writing JavaScript I want to throw up my hands and say "this is crazy!" but I can't remember what "this" refers to. 🤪`,
likes: 0
},
{
url: randomUrl(),
posted: randomDate(),
content: `How do you comfort a JavaScript bug? You console it. 🤭`,
likes: 0
}
]
}
},
{
name: 'bob',
handle: '@bobross',
email: 'bob@example.test',
avatar: '/profile/bob/avatar.webp',
about: 'Likes painting.',
tweets: {
create: [
{
url: randomUrl(),
posted: randomDate(),
content: `Use your imagination. Wind it up, blend it together. The joy of painting really is universal.`,
likes: 1
},
{
url: randomUrl(),
posted: randomDate(),
content: `The only thing I have control over is taking out the trash. 😂`,
likes: 4
},
{
url: randomUrl(),
posted: randomDate(),
content:
'Painting is as individual as people are. 👩🎨',
likes: 0
},
{
url: randomUrl(),
posted: randomDate(),
content:
'All we do is just sorta have an idea in our mind, and we just sorta let it happen. 🌈',
likes: 10
}
]
}
}
]
}
async function seed() {
const users = getUsers()
for (const user of users) {
await prisma.user.create({ data: user })
}
}
seed()I have some helper functions to create a random looking url and random date so it looks like it was posted on the same day.
I’m creating an array of users that matches the fields in the schema we created and then going over them and creating the users with prisma.user.create.
🖌️ To transpile TypeScript you need ts-node and let’s install Node.js types.
npm i -D ts-node @types/node🐿️ Because there are growing pains in Node.js with the transition to ES modules we need to specify a loader.
I figured this out by reading the error and doing some good old fashioned detective work but I hope they expand Seeding your database until this gets resolved. 🕵️
🖌️ Add a seed script inside package.json.
"prisma": {
  "seed": "node --loader ts-node/esm prisma/seed.ts"
}
🖌️ Seed the data.
npx prisma db seed🌱 The seed command has been executed.You can look at your data inside Prisma Studio.
🐿️ You can find the generated client and types if you dig around
node_modulesinside@prisma+client/.prisma/client.
Landing Page Layout
In this section you’re going to learn how to use global styles, nested layouts and catching and showing errors.
Before I start I’m going to update the path alias in the Svelte config because I prefer to use $root to be able to access the src folder from anywhere in the project.
import adapter from '@sveltejs/adapter-auto';
import preprocess from 'svelte-preprocess';

/** @type {import('@sveltejs/kit').Config} */
const config = {
	preprocess: preprocess(),
	kit: {
		adapter: adapter(),
		alias: {
			$root: 'src'
    }
	}
}

export default config;
I prefer not to use semicolons and have the line length be shorter so it’s easier for me to present code.
{
	"semi": false,
	"useTabs": true,
	"singleQuote": true,
	"trailingComma": "none",
	"printWidth": 60
}
🖌️ First let’s update the favicon so it’s more appropriate and you can also remove the one inside the static folder.
<!DOCTYPE html>
<html lang="en">
	<head>
		<meta charset="utf-8" />
		<meta name="description" content="" />
		<link rel="icon" href="https://fav.farm/🐦️" />
		<meta
			name="viewport"
			content="width=device-width, initial-scale=1"
		/>
		%sveltekit.head%
	</head>
	<body>
		<div>%sveltekit.body%</div>
	</body>
</html>
🖌️ I have some global styles with CSS variables and resets so let’s add those inside a styles folder in src.
global.css
/* Setup */

@import url('https://fonts.googleapis.com/css2?family=Inter:wght@400;700&display=swap');

*,
*::before,
*::after {
	margin: 0;
	padding: 0;
	box-sizing: border-box;
}

:root {
	--font-serif: 'Inter', sans-serif;
	--font-16: 1.6rem;
	--font-18: 1.8rem;
	--font-24: 2.4rem;
	--font-32: 3.2rem;
	--font-80: 8rem;

	--spacing-4: 0.4rem;
	--spacing-8: 0.5rem;
	--spacing-16: 1.6rem;
	--spacing-20: 2rem;
	--spacing-24: 2.4rem;
	--spacing-32: 3.2rem;

	--color-brand: hsl(204 88% 53%);
	--color-text-primary: hsl(0 0% 98%);
	--color-text-muted: hsl(210 34% 80%);
	--color-bg-primary: hsl(210 34% 13%);
	--color-bg-secondary: hsl(209, 35%, 15%);
	--color-btn-primary-active: var(--color-brand);
	--color-btn-primary-active-hover: hsl(204 88% 60%);
	--color-btn-primary-inactive: hsl(205 70% 33%);
	--color-btn-secondary: hsl(192 19% 95%);
	--color-border-primary: hsl(0, 0%, 34%);
	--color-link-hover: hsl(209 22% 19%);
	--color-placeholder: hsl(210 34% 80%);

	--radius-base: 2.4rem;
}

::-webkit-scrollbar {
	width: 4px;
	height: 4px;
}

::-webkit-scrollbar-track {
	background-color: transparent;
}

::-webkit-scrollbar-thumb {
	background-color: var(--color-brand);
	border-radius: var(--radius-base);
}

html {
	font-size: 62.5%;
}

html,
body {
	height: 100%;
}

body {
	font-family: var(--font-serif);
	font-size: var(--font-18);
	color: var(--color-text-primary);
	background-color: var(--color-bg-primary);
}

a {
	text-decoration: none;
	color: var(--color-text-primary);
}

label {
	display: block;
	margin: var(--spacing-8) 0;
	font-size: var(--font-24);
	color: var(--color-text-muted);
}

input {
	padding: var(--spacing-16);
	font-size: var(--font-24);
	border-radius: var(--radius-base);
	border: none;
}

.btn {
	padding: var(--spacing-16) var(--spacing-32);
	font-size: var(--font-18);
	font-weight: bold;
	color: var(--color-text-primary);
	background-color: var(--color-btn-primary-active);
	border-radius: var(--radius-base);
	border: none;
	cursor: pointer;
}

.btn:hover {
	background-color: var(--color-btn-primary-active-hover);
}

.btn:disabled {
	color: var(--color-text-muted);
	background-color: var(--color-btn-primary-inactive);
	cursor: not-allowed;
}

ul,
ol {
	list-style: none;
}

/* Utils */

.responsive {
	resize: both;
	overflow: scroll;
	border: 1px solid hsl(0 0% 0%);
}

.placeholder {
	padding: var(--spacing-20) 0;
	background-color: var(--color-placeholder);
	border-radius: var(--radius-base);
}
🖌️ To start let’s add a simple landing page so open index.svelte and update it.
<script lang="ts">
	import { fly } from 'svelte/transition'
</script>

<svelte:head>
	<title>Twittr</title>
</svelte:head>

<main
	class="container"
	in:fly={{ x: -100, duration: 250, delay: 300 }}
	out:fly={{ x: -100, duration: 250 }}
>
	<section class="hero">
		<h1 class="title">Twittr 🐦️</h1>
		<p class="text">Share your hot take with everyone.</p>
	</section>

	<section class="login">
		<a class="btn" href="/home">🔥 Share Your Hot Take</a>
	</section>
</main>

<style>
	.container {
		height: 100vh;
		display: grid;
	}

	.hero,
	.login {
		display: grid;
		place-content: center;
	}

	.hero {
		background-color: var(--color-brand);
		text-align: center;
	}

	.title {
		font-size: var(--font-80);
		z-index: 2;
	}

	.text {
		padding: var(--spacing-16);
		transform: rotate(2deg) translateY(-40%);
		background: var(--color-bg-primary);
		font-weight: bold;
		font-size: var(--font-24);
		z-index: 1;
	}

	@media (min-width: 1024px) {
		.container {
			grid-template-columns: repeat(2, 1fr);
		}
	}
</style>
The <svelte:head> is a special element you can use to insert elements inside the <head> element.
Let’s appreciate how links are just regular HTML in SvelteKit where in other frameworks it’s not so elegant.
We can import the global styles but they wouldn’t work for other pages.
You could create a <Layout> component that wraps everything but in SvelteKit you should use nested layout using the __layout.svelte component for repeating content and <slot> to catch everything else.
🐿️ Files starting with
_and__are ignored as pages in SvelteKit.
Let’s see how this looks in practice!
🖌️ Inside routes add __layout.svelte.
<script lang="ts">
	import '$root/styles/global.css'
</script>

<slot />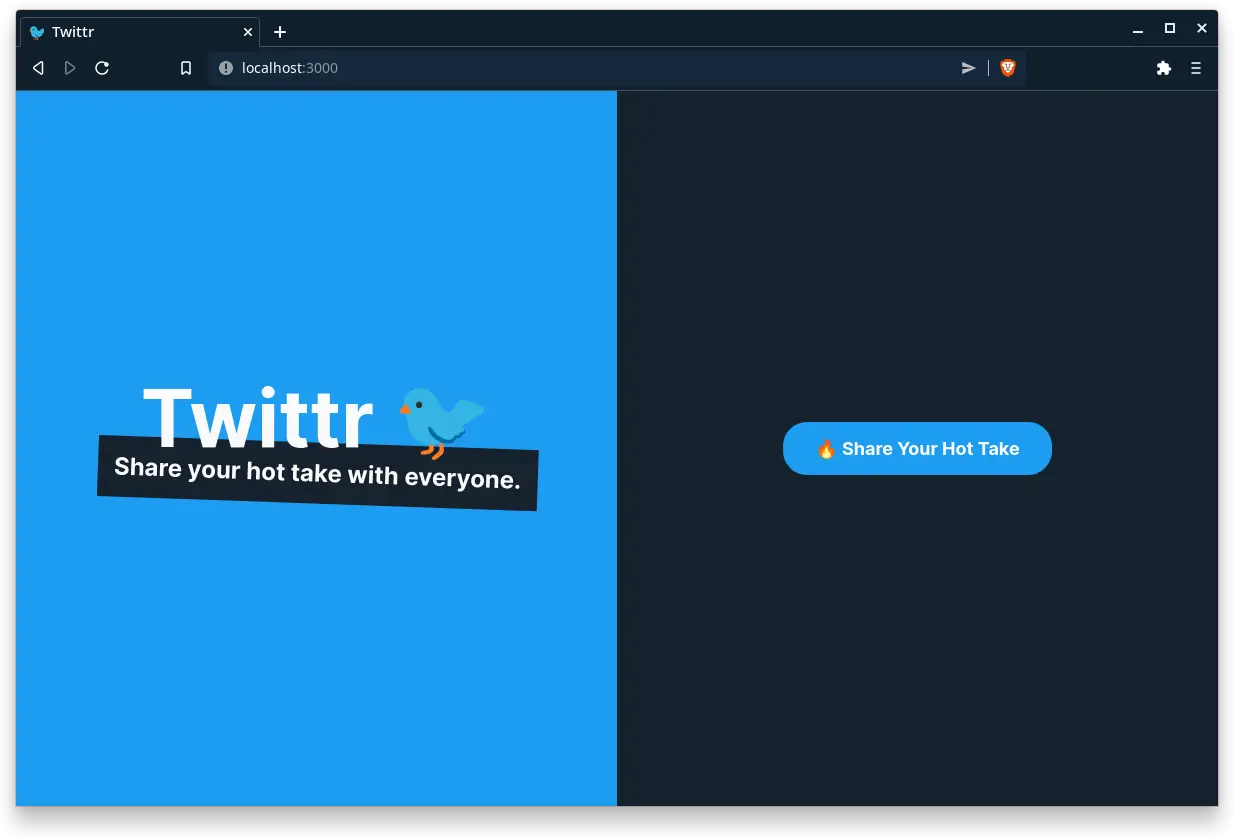
It’s that simple to have nested layouts! 🤯
This is going to catch everything else so you can read <slot /> as “rest of the site”.
We can nest layouts and break layouts if we have to. For example we’re going to have a specific home layout with nested pages but for settings that’s also nested we’re going to use a different layout.
What happens if we visit a page that doesn’t exist? Try going to http://localhost:3000/oops.
Oops! 💩
SvelteKit provides a default error page but it’s hard to read so we can do better. You can add a custom error page that’s going to show if a page fails to load.
🖌️ Let’s add __error.svelte inside routes to handle errors.
<script context="module" lang="ts">
	import type { Load } from '@sveltejs/kit'

	export const load: Load = ({ error, status }) => {
		return {
			props: {
				title: `${status}: ${error.message}`
			}
		}
	}
</script>

<script lang="ts">
	export let title: string
</script>

<div class="error">
	<h1>{title}</h1>
	<img
		src="/error.webp"
		alt="Surprised cat"
	/>
</div>

<style>
	.error {
		height: 100vh;
		display: grid;
		gap: var(--spacing-32);
		place-content: center;
		place-items: center;
	}

	img {
		width: 200px;
		height: 200px;
		border-radius: 50%;
		object-fit: cover;
	}
</style>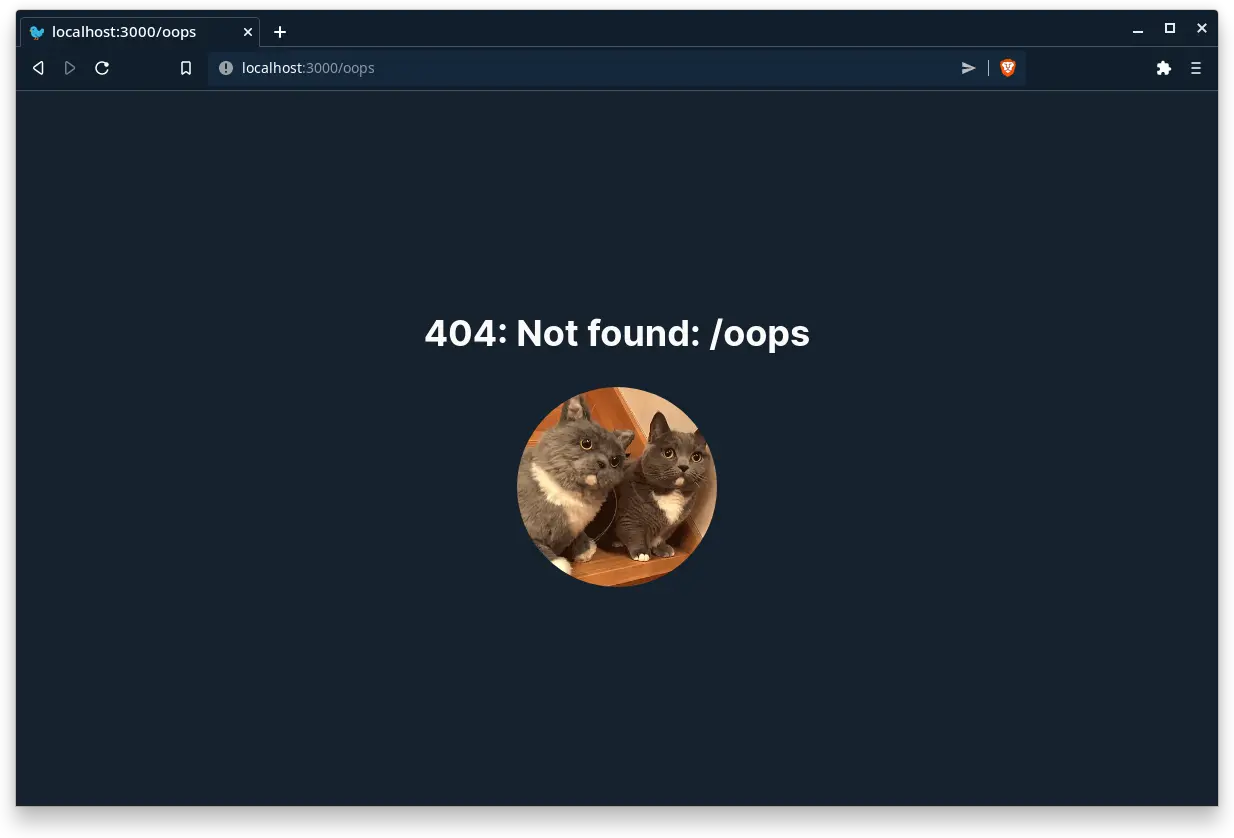
🐿️ If you remember from earlier
__error.svelteand__layout.sveltetemplates come from.svelte-kit.
The context="module" script runs before the component on the server inside the load function and returns a title prop that’s exposed to our component.
This is how the line between the frontend and backend is blurred and it just works.
Home Layout
In this section you’re going to add the home layout for the navigation, main content and sidebar.
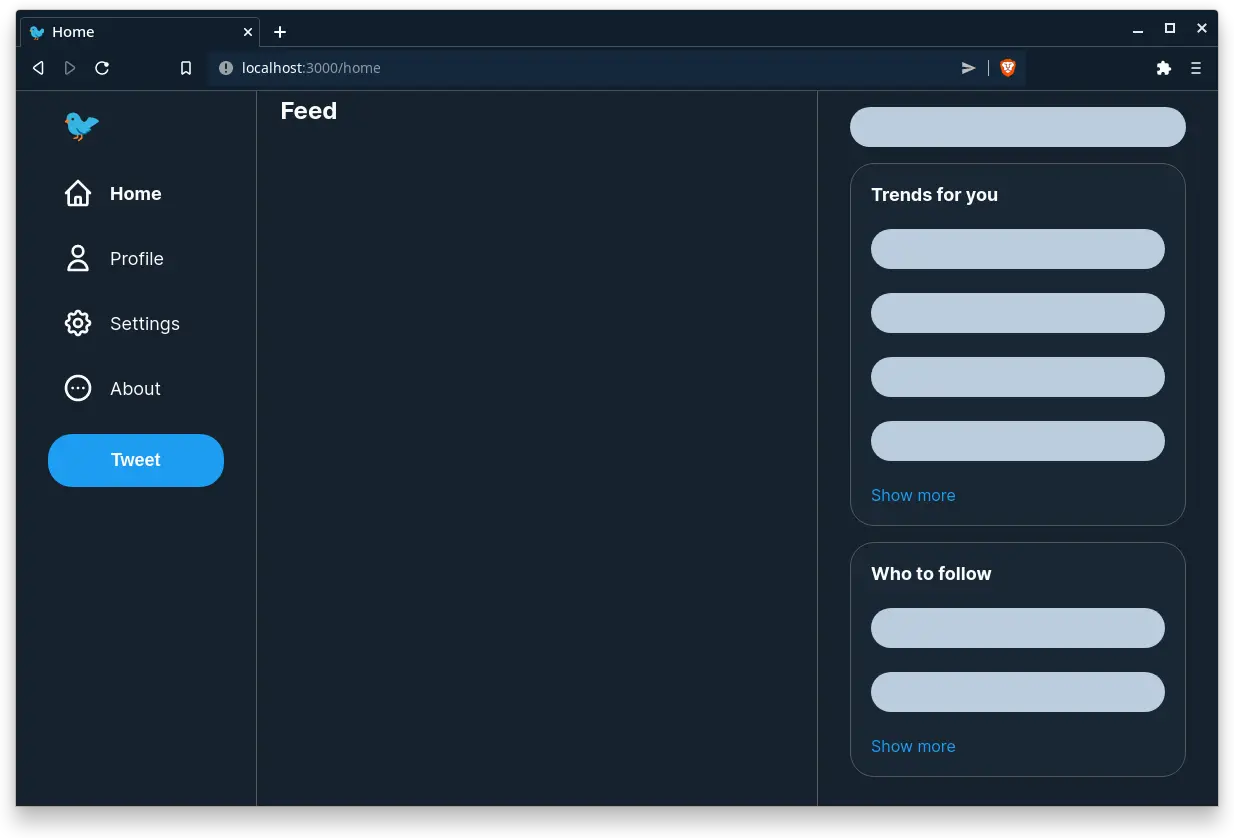
🖌️ Create a home folder inside routes with index.svelte inside which should make it available at http://localhost:3000/home.
<svelte:head>
	<title>Home</title>
</svelte:head>

<h1>Feed</h1>

<style>
	h1 {
		position: sticky;
		top: 0;
		padding: var(--spacing-8) var(--spacing-24);
		font-size: var(--font-24);
		backdrop-filter: blur(100px);
	}
</style>
I created an <Icon> component for SVGs to make the code more readable but I realized I can show you how awesome typed props are using TypeScript.
🖌️ Create a components folder in src and add icon.svelte.
icon.svelte
<script lang="ts">
	export let name: IconType
	export let width: string
	export let height: string

	type IconType = keyof typeof icons

	const icons = {
		home: {
			box: 24,
			svg: `
        <path
          stroke-linecap="round"
          stroke-linejoin="round"
          stroke-width="2"
          d="M3 12l2-2m0 0l7-7 7 7M5 10v10a1 1 0 001 1h3m10-11l2 2m-2-2v10a1 1 0 01-1 1h-3m-6 0a1 1 0 001-1v-4a1 1 0 011-1h2a1 1 0 011 1v4a1 1 0 001 1m-6 0h6"
        />
      `
		},
		profile: {
			box: 24,
			svg: `
        <path
          stroke-linecap="round"
          stroke-linejoin="round"
          stroke-width="2"
          d="M16 7a4 4 0 11-8 0 4 4 0 018 0zM12 14a7 7 0 00-7 7h14a7 7 0 00-7-7z"
        />
      `
		},
		settings: {
			box: 24,
			svg: `
        <path
          stroke-linecap="round"
          stroke-linejoin="round"
          stroke-width="2"
          d="M10.325 4.317c.426-1.756 2.924-1.756 3.35 0a1.724 1.724 0 002.573 1.066c1.543-.94 3.31.826 2.37 2.37a1.724 1.724 0 001.065 2.572c1.756.426 1.756 2.924 0 3.35a1.724 1.724 0 00-1.066 2.573c.94 1.543-.826 3.31-2.37 2.37a1.724 1.724 0 00-2.572 1.065c-.426 1.756-2.924 1.756-3.35 0a1.724 1.724 0 00-2.573-1.066c-1.543.94-3.31-.826-2.37-2.37a1.724 1.724 0 00-1.065-2.572c-1.756-.426-1.756-2.924 0-3.35a1.724 1.724 0 001.066-2.573c-.94-1.543.826-3.31 2.37-2.37.996.608 2.296.07 2.572-1.065z"
        />
        <path
          stroke-linecap="round"
          stroke-linejoin="round"
          stroke-width="2"
          d="M15 12a3 3 0 11-6 0 3 3 0 016 0z"
        />
      `
		},
		about: {
			box: 24,
			svg: `
        <path
          stroke-linecap="round"
          stroke-linejoin="round"
          stroke-width="2"
          d="M8 12h.01M12 12h.01M16 12h.01M21 12a9 9 0 11-18 0 9 9 0 0118 0z"
        />
      `
		},
		like: {
			box: 24,
			svg: `
        <path
          stroke-linecap="round"
          stroke-linejoin="round"
          stroke-width="1"
          d="M4.318 6.318a4.5 4.5 0 000 6.364L12 20.364l7.682-7.682a4.5 4.5 0 00-6.364-6.364L12 7.636l-1.318-1.318a4.5 4.5 0 00-6.364 0z"
        />
      `
		},
		permalink: {
			box: 24,
			svg: `
          <path
            stroke-linecap="round"
            stroke-linejoin="round"
            stroke-width="1"
            d="M10 6H6a2 2 0 00-2 2v10a2 2 0 002 2h10a2 2 0 002-2v-4M14 4h6m0 0v6m0-6L10 14"
          />
        `
		},
		remove: {
			box: 24,
			svg: `
          <path
            stroke-linecap="round"
            stroke-linejoin="round"
            stroke-width="1"
            d="M19 7l-.867 12.142A2 2 0 0116.138 21H7.862a2 2 0 01-1.995-1.858L5 7m5 4v6m4-6v6m1-10V4a1 1 0 00-1-1h-4a1 1 0 00-1 1v3M4 7h16"
          />
        `
		}
	}

	const icon = icons[name]
</script>

<svg
	class={$$props.class}
	{width}
	{height}
	viewBox="0 0 {icon.box} {icon.box}"
	fill="none"
	stroke="currentColor"
>
	{@html icon.svg}
</svg>
The <Icon> component is just an object that contains the SVG content and information and gives you back the SVG based on the passed name prop like <Icon name="home" />.
How can you know what name to pass for the icon? Using TypeScript you can do type IconType = 'home' | 'profile' but you would have to update it each time when you add or remove an icon.
The real magic is type IconType = keyof typeof icons that slurps up the keys of the object into a string literal. Hover over IconType to see the type.
How awesome is that! 😄
Before we add the layout we need to add the <Navigation> and <Trending> component that’s just a placeholder so the site looks more complete.
🖌️ Add navigation.svelte under components.
navigation.svelte
<script lang="ts">
	import { page } from '$app/stores'
	import Icon from '$root/components/icon.svelte'

	$: path = $page.url.pathname
</script>

<aside>
	<div class="container">
		<nav>
			<ul>
				<li>
					<a href="/" class="logo">🐦️</a>
				</li>

				<li class:active={path === '/home'}>
					<a href="/home">
						<Icon width="32" height="32" name="home" />
						<span>Home</span>
					</a>
				</li>

				<li class:active={path === '/home/profile/matia'}>
					<a href="/home/profile/matia">
						<Icon width="32" height="32" name="profile" />
						<span>Profile</span>
					</a>
				</li>

				<li class:active={path === '/home/settings'}>
					<a href="/home/settings">
						<Icon width="32" height="32" name="settings" />
						<span>Settings</span>
					</a>
				</li>

				<li class:active={path === '/home/about'}>
					<a href="/home/about">
						<Icon width="32" height="32" name="about" />
						<span>About</span>
					</a>
				</li>
			</ul>
		</nav>

		<button class="btn tweet">Tweet</button>
	</div>
</aside>

<style>
	.container {
		position: sticky;
		top: 0;
	}

	ul {
		display: grid;
		gap: var(--spacing-8);
		font-size: var(--font-18);
	}

	li a {
		display: inline-flex;
		align-items: center;
		gap: var(--spacing-16);
		padding: 1.4rem;
		border-radius: var(--radius-base);
		transition: all 0.2s ease;
	}

	li a:hover {
		background-color: var(--color-link-hover);
	}

	li.active {
		font-weight: 700;
	}

	.logo {
		font-size: var(--font-32);
	}

	span {
		display: none;
	}

	.tweet {
		display: none;
		text-align: center;
	}

	.tweet:hover {
		background-color: var(--color-btn-primary-active-hover);
	}

	@media (min-width: 1024px) {
		aside {
			padding: 0 var(--spacing-32);
		}

		span {
			display: block;
		}

		.tweet {
			width: 100%;
			display: block;
			margin-top: var(--spacing-16);
		}
	}
</style>
Inside the component we’re using a special page store value so we know what page we’re on and use it to apply an .active class if it matches the current page.
The tweet button is just a placeholder so it matches the original design. 😅
🖌️ Add trending.svelte under components.
trending.svelte
<aside>
	<div class="container">
		<div class="placeholder" />

		<section>
			<h2>Trends for you</h2>
			<div class="placeholder" />
			<div class="placeholder" />
			<div class="placeholder" />
			<div class="placeholder" />
			<a href="/">Show more</a>
		</section>

		<section>
			<h2>Who to follow</h2>
			<div class="placeholder" />
			<div class="placeholder" />
			<a href="/">Show more</a>
		</section>
	</div>
</aside>

<style>
	.container {
		display: none;
		position: sticky;
		top: 0;
	}

	section {
		display: flex;
		flex-direction: column;
		gap: var(--spacing-24);
		padding: 2rem;
		background-color: var(--color-bg-secondary);
		border: 1px solid var(--color-border-primary);
		border-radius: var(--radius-base);
	}

	h2 {
		font-size: var(--font-18);
	}

	a {
		font-size: var(--font-16);
		color: hsl(204, 88%, 53%);
	}

	@media (min-width: 1024px) {
		.container {
			width: 400px;
			display: flex;
			flex-direction: column;
			gap: var(--spacing-16);
			margin-top: var(--spacing-16);
			padding: 0 var(--spacing-32);
		}
	}
</style>
Now we can create another nested layout and it’s going to inherit the global styles from the original. This might be confusing at first but you have to play around with it so try modifying the layouts. Does it match how you thought it works?
🖌️ Create a __layout.svelte in the home folder.
<script lang="ts">
	import Navigation from '$root/components/navigation.svelte'
	import Trending from '$root/components/trending.svelte'
</script>

<div class="container">
	<Navigation />
	<main class="feed">
		<slot />
	</main>
	<Trending />
</div>

<style>
	.container {
		height: 100vh;
		max-width: min-content;
		margin: 0 auto;
		display: grid;
		grid-template-columns: min-content 50ch;
	}

	.feed {
		border: 1px solid var(--color-border-primary);
		border-top: none;
		border-bottom: none;
	}

	@media (min-width: 1024px) {
		.container {
			max-width: 1240px;
			margin: 0 auto;
			grid-template-columns: 1fr 50ch 1fr;
		}
	}
</style>
The home page is done! 🥳
I want to show you the real power of nested layouts — if a part of your site explodes it won’t bring the entire thing down but just the part that failed with a useful error message. 🤯
🖌️ Let’s add an error page which is going to be used by the other pages.
<script lang="ts" context="module">
	import type { Load } from '@sveltejs/kit'

	export const load: Load = ({ error, status }) => {
		return {
			props: {
				title: `${status}: ${error.message}`
			}
		}
	}
</script>

<script lang="ts">
	export let title: string
</script>

<div class="error">
	<h1>{title}</h1>
	<img src="/dancing.webp" alt="Person dancing" />
</div>

<style>
	.error {
		display: grid;
		gap: var(--spacing-32);
		padding: var(--spacing-24) var(--spacing-32);
		place-items: center;
	}

	img {
		width: 200px;
		height: 200px;
		border-radius: 50%;
		object-fit: cover;
	}
</style>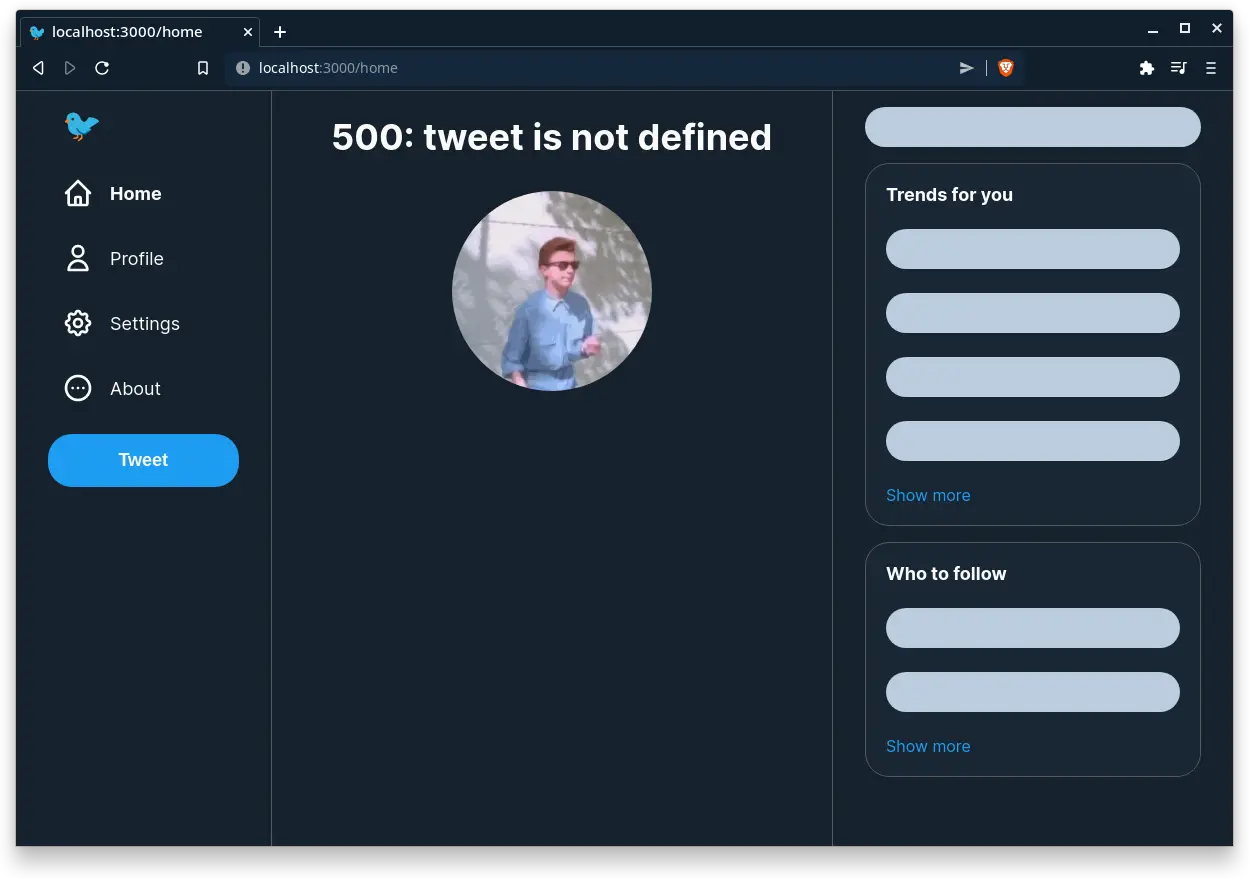
Showing Tweets
In this section you’re going to learn how to fetch data using SvelteKit endpoints to get the tweets from the database and show them in the feed.
SvelteKit endpoints are just files that export request handler functions that correspond to HTTP methods such as GET, POST, PATCH, DELETE.
A <form> has an action that’s the destination that processes the form submission and a method to submit the form with.
<form action="/api/items" method="GET">
  <button>Get Items</button>
</form>
🐿️ If might be unclear when to use GET and POST but think of GET as receiving data and POST when you’re sending data from a form to change something.
You might have an endpoint inside routes/api/items.ts that has a GET function which returns a list of items in a JSON format when you hit the /api/items endpoint.
export function GET() {
  // do some compute on the server
  const items = db.getItems()

  // if it fails we can return a 400 response
  if (!item) {
    status: 400
  }

  return {
    status: 200,
    headers: { 'Content-Type': 'application/json' }
    body: { items }
  }
}
If you use a loader function inside a component using fetch you can expose this as a prop to your component.
If the endpoint has the same name as the component you can just use the items prop from the shadow endpoint.
<script context="module">
	// you don't have to do this part!
	export function loader({ fetch }) {
		// fetch items from endpoint
	}
</script>

<script>
	// the prop comes from the same endpoint
	export let items
</script>
🐿️ Because the page and route have the same URL the SvelteKit documentation says to include the
accept: application/jsonheader to get JSON from the endpoint rather than HTML from the page. You can view the raw data by appending/__data.jsonto the URL. Because of this you can exclude theactionattribute on the form when doing a POST to the same endpoint.
I’m going to use the second method because it’s less code and having your endpoint where your component is makes it easier to update.
Endpoints are the same as using any other API or a Node.js framework like Express to create API endpoints but instead of using a separate backend framework you can do that with SvelteKit.
Because the compute is on the server we can talk to a database and return only the data we need so the user doesn’t pay for it.
It’s alright if this is confusing if you’re not used to receiving and sending data with forms because it’s almost a forgotten art if you only worked with modern JavaScript frameworks.
🐿️ Using SvelteKit you can have have a working site before JavaScript and use progressive enhancement after JavaScript loads.
Let’s start with showing the tweets which means we have to get the user information, tweet contents and if a tweet is liked.
Because we’re using Prisma we can get the data we need and shape it on the server to return only what we need. We’re in charge.
🐿️ Twitter is a single-page application so it can have nice things as infinite scrolling but if you disable JavaScript it’s unusable. Later you learn how you can use server-side rendering as a fallback and enhance the user experience with JavaScript.
🖌️ We should initialize the Prisma client so we can use it. I like to keep third party code inside the src/lib folder so create the prisma.ts file.
import { PrismaClient } from '@prisma/client'

const prisma = new PrismaClient()

export default prisma
🖌️ I also like to keep my helper functions inside src/utils so add a date.ts helper that returns “time ago” for the tweet if it’s not older than a day otherwise it shows the date.
export function timePosted(createdAt: Date): string {
	try {
		const posted = new Date(createdAt).getTime()
		const currentTime = new Date().getTime()
		const difference = currentTime - posted
		const seconds = difference / 1000
		const minutes = seconds / 60
		const hours = minutes / 60

		if (minutes <= 60) {
			return `${minutes.toFixed()}m`
		}

		if (hours <= 24) {
			return `${hours.toFixed()}h`
		}

		return Intl.DateTimeFormat('en-US', {
			dateStyle: 'medium'
		}).format(posted)
	} catch (error) {
		throw new Error(`💩 Something went wrong: ${error}`)
	}
}
Since authentication is outside the scope of this post we’re going to use a hardcoded user id but you can implement it later if you want.
🐿️ Use Ctrl + Spacebar to try out the amazing Prisma autocompletion because it knows everything about your schema and is strongly typed.
🖌️ Start by creating the index.ts endpoint inside home. It has the same name as index.svelte so we get access to the props.
import type { RequestHandler } from '@sveltejs/kit'

import prisma from '$root/lib/prisma'
import { timePosted } from '$root/utils/date'

export const GET: RequestHandler = async () => {
	// get the tweets and the user data (Prisma 😍)
	const data = await prisma.tweet.findMany({
		include: { user: true },
		orderBy: { posted: 'desc' }
	})

	// get the liked tweets
	const liked = await prisma.liked.findMany({
		where: { userId: 1 },
		select: { tweetId: true }
	})

	// we just want an array of the ids
	const likedTweets = Object.keys(liked).map(
		(key) => liked[key].tweetId
	)

	// we can shape the data however we want
	// so our user doesn't have to pay the cost for it
	const tweets = data.map((tweet) => {
		return {
			id: tweet.id,
			content: tweet.content,
			likes: tweet.likes,
			posted: timePosted(tweet.posted),
			url: tweet.url,
			avatar: tweet.user.avatar,
			handle: tweet.user.handle,
			name: tweet.user.name,
			liked: likedTweets.includes(tweet.id)
		}
	})

	if (!tweets) {
		return { status: 400 }
	}

	return {
		headers: { 'Content-Type': 'application/json' },
		status: 200,
		body: { tweets }
	}
}
🐿️ Anything you
console.loghere gets logged to the terminal because it’s on the server. Theloaderfunction on the other hand runs on the server and client so you shouldn’t use it for secrets.
🖌️ Let’s quickly add a type for the tweet inside src/types by creating a index.ts file so we can reuse it.
export type TweetType = {
	id: number
	content: string
	likes: number
	posted: string
	url: string
	avatar: string
	handle: string
	name: string
	liked: boolean
}
Back in index.svelte we can use the tweets prop. You can log it if you want but let me share another 🔥 tip with you.
You can print information to the screen using JSON.stringify because sometimes it’s easier to look at than using the console.
<script>
	export let tweets
</script>

<pre>
	{JSON.stringify(tweets, null, 2)}
</pre>
We just have to loop over each tweet and show it. This is the shape of our data.
{
	"id": 2,
	"content": "I love Svelte! ❤️",
	"likes": 24,
	"posted": "11h",
	"url": "632fd738d4d0b",
	"avatar": "/profile/matia/avatar.webp",
	"handle": "@joyofcodedev",
	"name": "matia",
	"liked": false
}
We’re going to pass each tweet as a prop to a <Tweet> component mostly because it’s more organized and when you want to make a change to it you know what file to open instead of surfing through a sea of things. 🏄️
🖌️ Update index.svelte.
<script lang="ts">
	import Tweet from '$root/components/tweet.svelte'
	import type { TweetType } from '$root/types'

	export let tweets: TweetType[] = []
</script>

<svelte:head>
	<title>Home</title>
</svelte:head>

<h1>Feed</h1>

{#each tweets as tweet (tweet.id)}
	<Tweet {tweet} />
{/each}

<!-- ... -->
🖌️ Create the tweet.svelte component inside components.
tweet.svelte
<script lang="ts">
	import { fade, fly } from 'svelte/transition'

	import Icon from '$root/components/icon.svelte'
	import type { TweetType } from '$root/types'

	export let tweet: TweetType
</script>

<article class="tweet-container" transition:fade>
	<a class="avatar" href="/home/profile/{tweet.name}">
		<img
			width="140"
			height="140"
			src={tweet.avatar}
			alt={tweet.name}
		/>
	</a>

	<div class="tweet-details">
		<div>
			<a href="/home/profile/{tweet.name}" class="user">
				{tweet.name}
			</a>
			<span class="handle">{tweet.handle}</span>
			<span class="posted"> · {tweet.posted}</span>
		</div>

		<div class="tweet">
			<div class="content">
				{tweet.content}
			</div>

			<div class="actions">
				<form action="/home/like" method="post">
					<input type="hidden" name="id" value={tweet.id} />
					<button
						class="btn like"
						title="Like"
						type="submit"
					>
						<div class="circle">
							<Icon
								width="24"
								height="24"
								name="like"
								class={tweet.liked ? 'liked' : ''}
							/>
						</div>
						<span class="count">
							{#key tweet.likes}
								{#if tweet.likes}
									<div
										in:fly={{ y: 40 }}
										out:fly={{ y: 40 }}
									>
										{tweet.likes}
									</div>
								{/if}
							{/key}
						</span>
					</button>
				</form>

				<a
					href="/home/profile/{tweet.name}/status/{tweet.url}"
					class="permalink"
					title="Permalink"
				>
					<div class="circle">
						<Icon width="24" height="24" name="permalink" />
					</div>
				</a>

				<form action="/home?_method=delete" method="post">
					<input type="hidden" name="id" value={tweet.id} />
					<button
						aria-label="Remove tweet"
						class="btn remove"
						title="Remove"
						type="submit"
					>
						<div class="circle">
							<Icon width="24" height="24" name="remove" />
						</div>
					</button>
				</form>
			</div>
		</div>
	</div>
</article>

<style>
	.avatar {
		align-self: start;
	}

	img {
		width: 48px;
		height: 48px;
		border-radius: 50%;
	}

	button {
		font-size: var(--font-16);
		padding: var(--spacing-16);
	}

	.tweet-container:hover {
		background-color: var(--color-bg-secondary);
	}

	.tweet-container {
		display: grid;
		grid-template-columns: min-content 1fr;
		gap: var(--spacing-16);
		padding: var(--spacing-16) var(--spacing-24);
		transition: all 0.3s;
	}

	.tweet-container:not(:last-child) {
		border-bottom: 1px solid var(--color-border-primary);
	}

	.tweet-details {
		display: grid;
		gap: var(--spacing-8);
	}

	.user {
		font-weight: 700;
		text-transform: capitalize;
	}

	.user:hover {
		text-decoration: underline;
	}

	.handle,
	.posted {
		font-size: var(--font-16);
		color: var(--color-text-muted);
	}

	.content {
		font-size: var(--font-16);
	}

	.actions {
		display: flex;
		gap: var(--spacing-32);
		margin-top: var(--spacing-16);
	}

	.actions button,
	.actions a {
		padding: 0;
		color: var(--color-text-muted);
		background: none;
		transition: all 0.3s;
	}

	.circle {
		width: 24px;
		height: 24px;
		display: grid;
		place-content: center;
		padding: var(--spacing-16);
		border-radius: 50%;
		transition: all 0.3s;
	}

	.circle > :global(.liked) {
		color: hsl(9 100% 64%);
		fill: hsl(9 100% 64%);
	}

	.like {
		display: flex;
		align-items: center;
	}

	.like:hover {
		color: hsl(9 100% 64%);
	}

	.like:hover .circle {
		background: hsla(9 100% 64% / 10%);
	}

	.permalink:hover {
		color: hsl(120 100% 40%);
	}

	.permalink:hover .circle {
		background-color: hsla(120 100% 50% / 4%);
	}

	.remove:hover {
		color: hsl(0 100% 50%);
	}

	.remove:hover .circle {
		background-color: hsla(0 100% 50% / 4%);
	}

	.like,
	.remove,
	.permalink {
		width: 80px;
	}

	.count {
		margin-left: var(--spacing-16);
		font-size: 1.4rem;
		font-weight: 400;
		overflow: hidden;
	}
</style>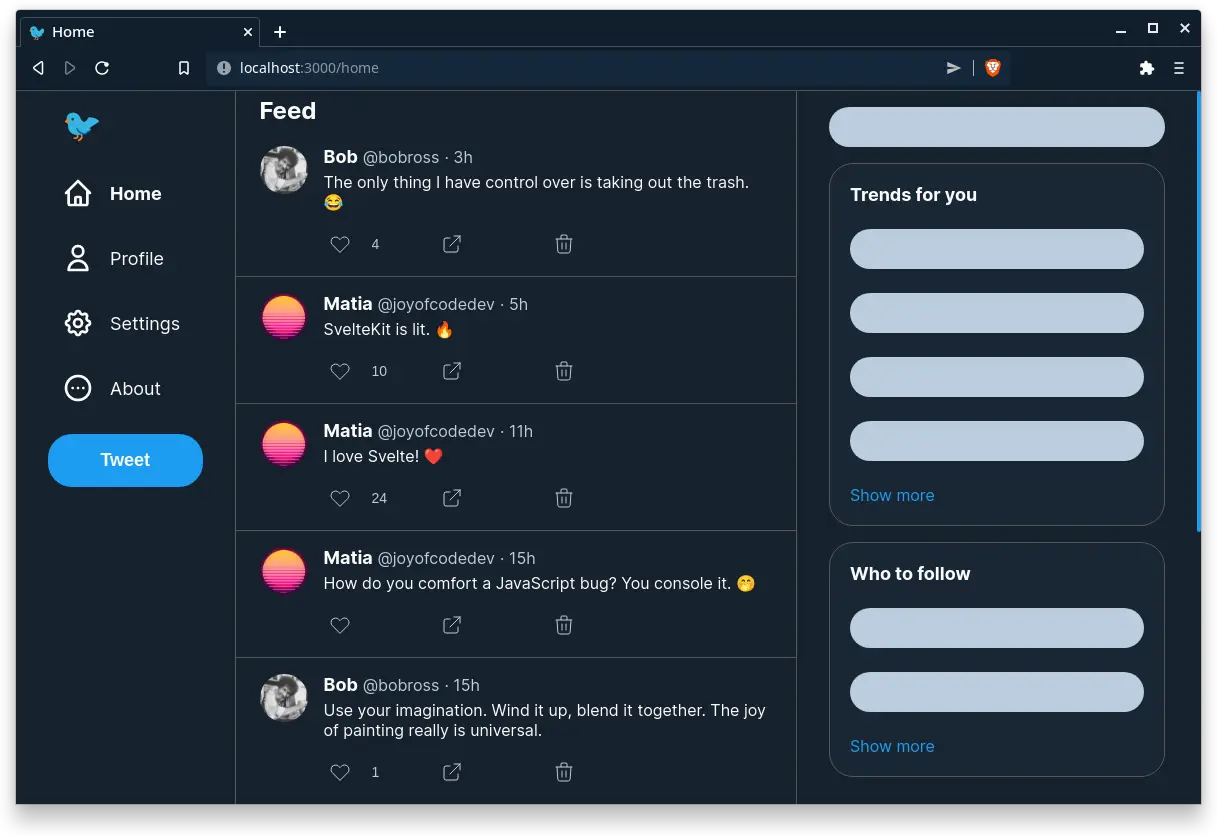
Because we designed the API and shaped the data we have complete control of how we want to use it.
If you’re prerendering pages you don’t have to think about caching because they’re static so if there’s a CDN in front of your site it caches it for you until you rebuild and redeploy the site but if you’re using server-side rendering you can set cache-control HTTP headers in your endpoint and specify when the page should rebuild.
export async function GET() {
	// ...

	return {
		headers: {
			'Cache-Control': 'max-age=0, s-maxage=60',
		},
		body: { data },
	}
}
The max-age response directive informs the browser to not cache the page and s-max-age helps the CDN know how long to cache the page in seconds.
The load function in your page also has a maxage option you can set.
Compose Tweet
In this section you’re going to learn how to add a tweet using the POST request.
So far we can only read hot takes but we can’t post any! 😱 This requires urgent fixing.
🖌️ Create a compose.svelte component inside components and import it inside home/index.svelte.
<script lang="ts">
	let tweet = ''
	let maxCharacters = 140

	$: charactersLeft = maxCharacters - tweet.length
</script>

<div class="compose">
	<img src="/profile/matia/avatar.webp" alt="Avatar" />
	<form action="/home" method="post" autocomplete="off">
		<input
			aria-label="Enter your Tweet"
			bind:value={tweet}
			name="tweet"
			placeholder="What's your hot take?"
			type="text"
		/>
		<button
			class="btn"
			class:error={charactersLeft < 0}
			disabled={charactersLeft <= 0}
			type="submit"
		>
			{charactersLeft === maxCharacters
				? 'Tweet'
				: charactersLeft}
		</button>
	</form>
</div>

<style>
	.compose {
		display: grid;
		grid-template-columns: min-content 1fr;
		align-items: center;
		gap: var(--spacing-16);
		padding: var(--spacing-16) var(--spacing-24);
		border-bottom: 1px solid var(--color-border-primary);
	}

	img {
		width: 48px;
		height: 48px;
		border-radius: 50%;
	}

	form {
		display: flex;
		align-items: center;
		gap: var(--spacing-16);
	}

	input {
		color: var(--color-text-primary);
		background-color: transparent;
	}

	button {
		min-width: 80px;
		font-size: var(--font-16);
		padding: var(--spacing-16);
	}

	.error {
		color: tomato;
	}
</style><script lang="ts">
import Compose from '$root/components/compose.svelte'
// ...
</script>
<!-- ... -->
<Compose />
<!-- ... -->Crisis averted! The form is going to POST to /home so we can start adding the API inside home/index.ts.
// ...

export const POST: RequestHandler = async ({ request }) => {
	const form = await request.formData()
	const tweet = String(form.get('tweet'))

	// you should probably use a validation library
	if (tweet.length > 140) {
		return {
			status: 400,
			body: 'Maximum Tweet length exceeded.',
			headers: { location: '/home' }
		}
	}

	// the user id is hardcoded but you can get it from a session
	await prisma.tweet.create({
		data: {
			posted: new Date(),
			url: Math.random().toString(16).slice(2),
			content: tweet,
			likes: 0,
			user: { connect: { id: 1 } }
		}
	})

	return {}
}
To get the form data use request.formData() and then you can use FormData methods such as get to get the data you want which is why it’s important to name your form elements.
You can read about it in the body parsing section of the endpoints documentation.
After you get the value from the form you can create a new tweet that’s tied to the user. I return an empty object because it’s going to redirect to the form action which is /home.
This is what I love about SvelteKit because it’s using the web platform since request is just a request object making you a better web developer.
🐿️ You should do validation on the client to give the user feedback and the server for proper validation because anyone can change the code on the client. Use a form validation library to give you a nice API.
Share your hot take! 🔥

Removing Tweets
In this section you’re going to learn how to remove a tweet using a DELETE request.
“But I thought you could only use GET and POST methods for forms?” I hear you ask you gleeful master of the web arts.
You’re right! I’m not going to pretend I understand the history but how do we let the server know when you have sent a DELETE request?
SvelteKit lets you override HTTP methods just by changing the config and for the action you add the HTTP verb at the end like /home?_method=delete but you use POST for the method.
This is our form inside tweet.svelte for removing a tweet. We’re using a 🥷 sneaky hidden input to send the tweet id.
<form action="/home?_method=delete" method="post">
	<input type="hidden" name="id" value={tweet.id} />
	<button
		aria-label="Remove tweet"
		class="btn remove"
		title="Remove"
		type="submit"
	>
		<div class="circle">
			<Icon width="24" height="24" name="remove" />
		</div>
	</button>
</form>
🖌️ Update svelte.config.js.
// ...

const config = {
	// ...
	kit: {
		// ...
		methodOverride: { allowed: ['DELETE'] }
	}
}
Stop the development server with Ctrl + C and restart it because you changed the config.
🖌️ Update the home/index.ts endpoint.
// ...

export const DELETE: RequestHandler = async ({ request }) => {
	const form = await request.formData()
	const tweetId = +form.get('id')

	await prisma.tweet.delete({ where: { id: tweetId } })

	return {
		status: 303,
		headers: { location: '/home' }
	}
}
You get the tweet id from the form and turn it into a number after which you remove it from the database. 🧹
Because POST is used for DELETE a 303 redirect status is used that means it doesn’t link to a new resource.
Liking a Tweet
In this section you’re going to implement liking a tweet.
For liking a tweet we have to:
- check if the tweet is already liked, if so unlike it and remove the count because it should be unique
- if the tweet isn’t liked add the record and update the count
We can maybe add this to our existing endpoint and figure out what action to take for the POST request but it’s simpler to make another endpoint.
🖌️ Add a like.ts endpoint inside home.
import type { RequestHandler } from '@sveltejs/kit'

export const POST: RequestHandler = async ({ request }) => {
	const form = await request.formData()
	const id = +form.get('id')

	const liked = await prisma.liked.count({
		where: { tweetId: id }
	})

	if (liked === 1) {
		await prisma.liked.delete({ where: { tweetId: id } })

		const count = await prisma.tweet.findUnique({
			where: { id },
			select: { likes: true }
		})

		await prisma.tweet.update({
			where: { id },
			data: { likes: (count.likes -= 1) }
		})

		return {
			status: 303,
			headers: {
				location: '/home'
			}
		}
	}

	await prisma.liked.create({
		data: {
			tweetId: id,
			user: { connect: { id: 1 } }
		}
	})

	const count = await prisma.tweet.findUnique({
		where: { id },
		select: { likes: true }
	})

	await prisma.tweet.update({
		where: { id },
		data: { likes: (count.likes += 1) }
	})

	return {
		status: 303,
		headers: { location: '/home' }
	}
}
Because you don’t want to redirect the page to /home/like you have to specify a redirect to /home and use the 303 status because it’s not a new resource.
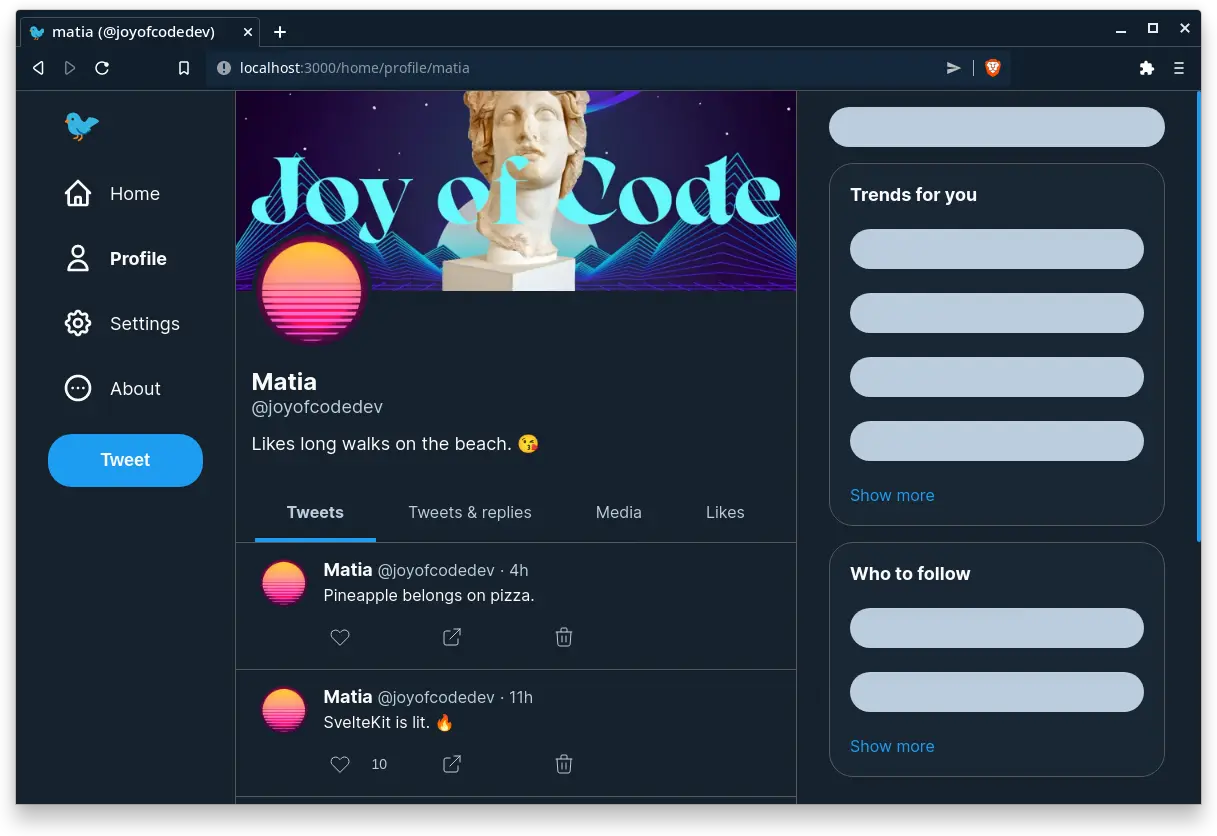
User Profile Page
In this section you’re going to learn how to use dynamic parameters to implement a user profile.
If you have a home/profile/user endpoint where the user value is dynamic it looks more like home/profile/[user] where the value inside the brackets is dynamic.
You can use [parameter] for naming your folder and files to get a dynamic parameter you can catch in your endpoint.
🖌️ Add a [user].svelte file inside home/profile/[user].svelte.
<script lang="ts">
	import type { User } from '@prisma/client'

	import Tweet from '$root/components/tweet.svelte'
	import type { TweetType } from '$root/types'

	export let profile: User
	export let tweets: TweetType[]
</script>

<svelte:head>
	<title>{profile.name} ({profile.handle})</title>
</svelte:head>

<div class="profile">
	<img
		class="banner"
		src="/profile/{profile.name}/banner.webp"
		alt="Profile banner"
	/>
	<img
		class="avatar"
		src={profile.avatar}
		alt={profile.name}
	/>
</div>

<div class="content">
	<div class="user">
		<span class="name">{profile.name}</span>
		<span class="handle">{profile.handle}</span>
	</div>
	<div class="about">
		<span>{profile.about}</span>
	</div>
</div>

<nav>
	<a href="/" class="active">Tweets</a>
	<a href="/">Tweets & replies</a>
	<a href="/">Media</a>
	<a href="/">Likes</a>
</nav>

{#each tweets as tweet (tweet.id)}
	<Tweet {tweet} />
{/each}

<style>
	.profile {
		display: grid;
		grid-template-columns: repeat(4, 1fr);
		grid-template-rows: 200px 60px;
	}

	.banner {
		grid-column: 1 / -1;
		grid-row: 1 / 2;
	}

	.avatar {
		grid-column: 1 / 2;
		grid-row: 1 / -1;
		place-self: center;
		align-self: flex-end;
		width: 120px;
		height: 120px;
		margin: 0 var(--spacing-16);
		border-radius: 50%;
		border: 4px solid var(--color-bg-primary);
	}

	img {
		width: 100%;
		height: 100%;
		object-fit: cover;
	}

	.content {
		display: grid;
		gap: var(--spacing-16);
		margin-top: var(--spacing-16);
		padding: 0 var(--spacing-16);
	}

	.user {
		display: grid;
	}

	.name {
		font-size: var(--font-24);
		font-weight: 700;
		text-transform: capitalize;
	}

	.handle {
		color: var(--color-text-muted);
	}

	nav {
		display: flex;
		justify-content: center;
		margin-top: var(--spacing-32);
		border-bottom: 1px solid var(--color-border-primary);
	}

	a {
		padding: var(--spacing-16) var(--spacing-32);
		font-size: var(--font-16);
		color: var(--color-text-muted);
		border-bottom: 4px solid transparent;
		transition: all 0.2s;
	}

	a:hover {
		background-color: var(--color-link-hover);
		border-bottom: 4px solid var(--color-brand);
	}

	.active {
		font-weight: 700;
		border-bottom: 4px solid var(--color-brand);
	}
</style>
🖌️ Add a [user].ts endpoint inside home/profile.
import type { RequestHandler } from '@sveltejs/kit'

import prisma from '$root/lib/prisma'
import { timePosted } from '$root/utils/date'

export const GET: RequestHandler = async ({ params }) => {
	const profile = await prisma.user.findFirst({
		where: { name: params.user }
	})

	const tweets = await prisma.tweet.findMany({
		where: { user: { id: 1 } },
		include: { user: true },
		orderBy: { posted: 'desc' }
	})

	const liked = await prisma.liked.findMany({
		where: { userId: 1 },
		select: { tweetId: true }
	})

	const likedTweets = Object.keys(liked).map(
		(key) => liked[key].tweetId
	)

	if (!profile || !tweets || tweets.length === 0) {
		return { status: 404 }
	}

	const userTweets = tweets.map((tweet) => {
		return {
			id: tweet.id,
			content: tweet.content,
			likes: tweet.likes,
			posted: timePosted(tweet.posted),
			url: tweet.url,
			avatar: tweet.user.avatar,
			handle: tweet.user.handle,
			name: tweet.user.name,
			liked: likedTweets.includes(tweet.id)
		}
	})

	return {
		status: 200,
		body: { profile, tweets: userTweets }
	}
}
Notice you get redirected to home if you like or remove a tweet but it’s fine. You can always change that later in a couple of ways like passing where you want to redirect or using another endpoint.
Linking to a Tweet
In this section you’re going to learn how to use dynamic parameters to add a permalink to the tweet so people can link to our hot takes.
If you hover over a permalink you might see a weird link such as home/profile/matia/status/1cd23224e4f38.
I’m glad I picked this example for the link because it’s perfect to showcase how flexible SvelteKit routing is and how you can design endpoints.
Imagine if you had to create a URL like this. First identify the dynamic parts which makes home/profile/[user]/status/[tweetId].
To create something like this you simply create the same path in your folder structure. 🤯
Inside the endpoint you can get the user and the tweet id that’s the special url we created in the schema.
🖌️ Create the home/profile/[user]/status/[tweetId]/index.svelte path.
<h1>Profile</h1>Try going to a permalink and you should see the title for each one.
🖌️ Create a index.ts endpoint in the same place.
import type { RequestHandler } from '@sveltejs/kit'

import prisma from '$root/lib/prisma'
import { timePosted } from '$root/utils/date'

export const GET: RequestHandler = async ({ params }) => {
	const tweet = await prisma.tweet.findFirst({
		where: { url: params.tweetId },
		include: { user: true }
	})

	const liked = await prisma.liked.findMany({
		where: { userId: 1 },
		select: { tweetId: true }
	})

	const likedTweets = Object.keys(liked).map(
		(key) => liked[key].tweetId
	)

	const userTweet = {
		id: tweet.id,
		content: tweet.content,
		likes: tweet.likes,
		posted: timePosted(tweet.posted),
		url: tweet.url,
		avatar: tweet.user.avatar,
		handle: tweet.user.handle,
		name: tweet.user.name,
		liked: likedTweets.includes(tweet.id)
	}

	return {
		status: 200,
		body: { tweet: userTweet }
	}
}
🖌️ Update index.svelte.
<script lang="ts">
	import Tweet from '$root/components/tweet.svelte'
	import type { TweetType } from '$root/types'

	export let tweet: TweetType

	const name = tweet.name
	const content = tweet.content.slice(0, 60)
</script>

<svelte:head>
	<title>{name} on Twittr: "{content}..."</title>
</svelte:head>

<Tweet {tweet} />
That’s it! 😄
I even recreated how Twitter shows the name and content in the title. Did you know that <title> in most browsers can only show up to 60 characters?
Settings Page
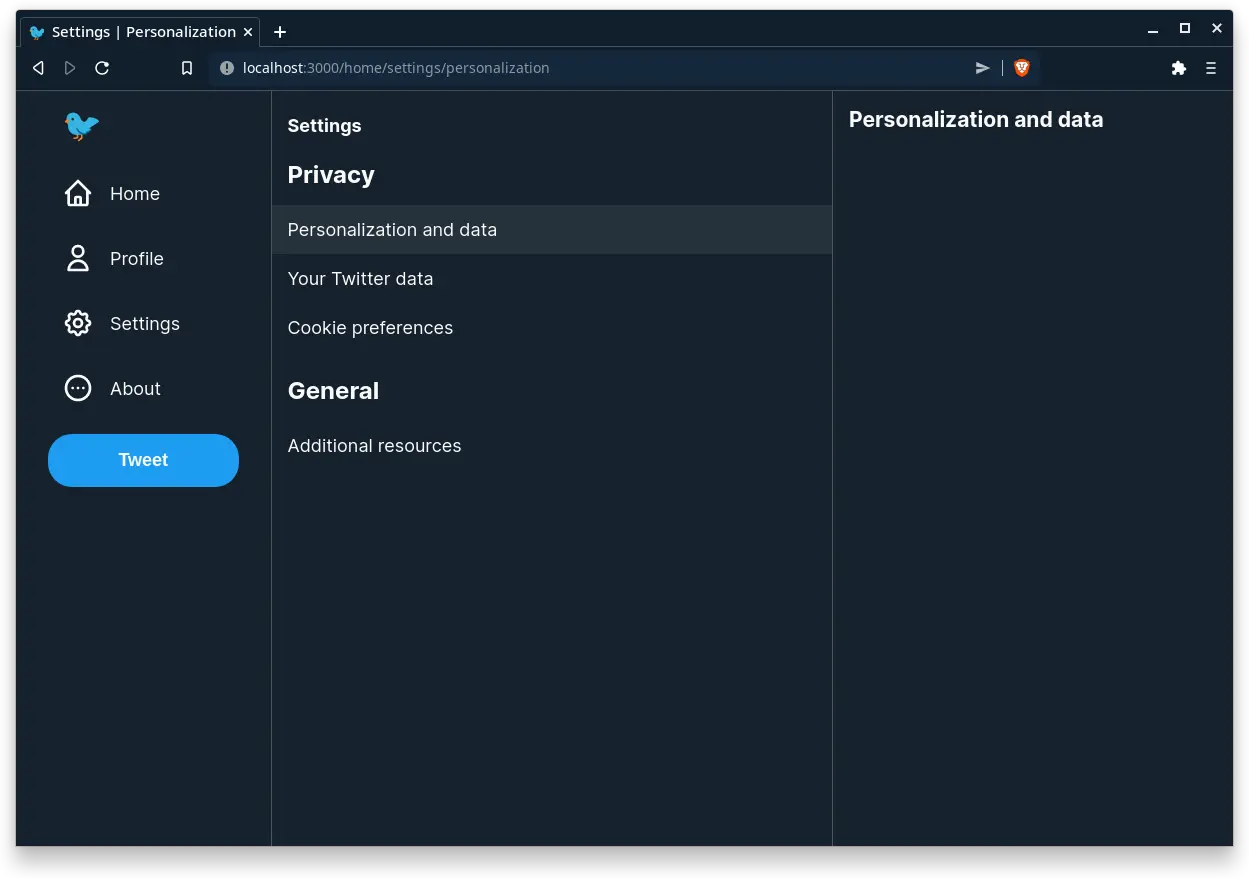
In this section you’re going to learn how to reset a layout.
I want to show you how awesome nested layouts are inspired by the Twitter settings. Notice how the contents of the settings update in a separate part of the page when you use the navigation.
🖌️ First start by creating index.svelte inside home/settings which is going to be empty.
<svelte:head>
	<title>Settings</title>
</svelte:head>
🖌️ After that you’re going to create some random pages inside settings.
personalization.svelte
<svelte:head>
	<title>Settings | Personalization</title>
</svelte:head>

<h3>Personalization and data</h3>
data.svelte
<svelte:head>
	<title>Settings | Data</title>
</svelte:head>

<h3>Your Twitter data</h3>
cookies.svelte
<svelte:head>
	<title>Settings | Cookies</title>
</svelte:head>

<h3>Cookie preferences</h3>
resources.svelte
<svelte:head>
	<title>Settings | Resources</title>
</svelte:head>

<h3>Additional resources</h3>
I want to reset the layout because while everything is almost the same the settings page doesn’t have a sidebar but instead it’s going to have the content.
SvelteKit has the concept of named layouts where you can create any layout you want to use such as __layout-reset.svelte and reference it with __layout@reset.svelte.
🖌️ Create a named layout in routes.
<slot />To reset the layout create __layout@reset.svelte inside settings.
<script lang="ts">
	import { page } from '$app/stores'
	import Navigation from '$root/components/navigation.svelte'

	$: path = $page.url.pathname
</script>

<div class="container">
	<Navigation />
	<main class="settings">
		<h1 class="title">Settings</h1>

		<section class="privacy">
			<h2>Privacy</h2>
			<a
				class:active={path ===
					'/home/settings/personalization'}
				href="/home/settings/personalization"
			>
				Personalization and data
			</a>

			<a
				class:active={path === '/home/settings/data'}
				href="/home/settings/data">
				Your Twittr data
			</a>

			<a
				class:active={path === '/home/settings/cookies'}
				href="/home/settings/cookies"
			>
				Cookie preferences
			</a>
		</section>

		<section class="general">
			<h2>General</h2>
			<a
				class:active={path === '/home/settings/resources'}
				href="/home/settings/resources"
			>
				Additional resources
			</a>
		</section>
	</main>

	<aside>
		<slot />
	</aside>
</div>

<style>
	.container {
		height: 100vh;
		max-width: min-content;
		margin: 0 auto;
		display: grid;
		grid-template-columns: min-content 50ch;
	}

	.settings {
		display: grid;
		grid-auto-rows: min-content;
		gap: var(--spacing-24);
		border: 1px solid var(--color-border-primary);
		border-top: none;
		border-bottom: none;
	}

	.privacy,
	.general {
		display: grid;
	}

	h1 {
		font-size: var(--font-18);
		margin-top: var(--spacing-24);
		padding: 0 var(--spacing-16);
	}

	h2 {
		font-size: var(--font-24);
		padding: 0 var(--spacing-16);
	}

	h2 {
		margin-bottom: var(--spacing-16);
	}

	a {
		padding: 1.4rem var(--spacing-16);
	}

	.active {
		background: var(--color-link-hover);
	}

	aside {
		display: none;
		padding: var(--spacing-16);
	}

	@media (min-width: 1024px) {
		.container {
			max-width: 1240px;
			margin: 0 auto;
			grid-template-columns: 1fr 50ch 1fr;
		}

		aside {
			width: 400px;
			display: block;
		}
	}
</style>
The content is going to show on the right when we use the navigation inside the <aside> element where you used <slot />.
Unfortunately I didn’t have enough time to make it responsive. 😅
About Page
In this section you’re going to learn how you can use page options to change how a page is rendered.
If you don’t need JavaScript for a simple page you know doesn’t change often you can prerender it.
🖌️ Create index.svelte inside home/about.
<script context="module" lang="ts">
	import { dev } from '$app/env'

	// load JavaScript in development for hot module replacement
	export const hydrate = dev

	// prerender static page in production
	export const prerender = true
</script>

<svelte:head>
	<title>About</title>
</svelte:head>

<div class="container">
	<h1>About</h1>
	<div class="content">
		<p>
			Lorem ipsum dolor sit amet consectetur adipisicing
			elit. Voluptatibus eveniet quos impedit cumque,
			deleniti aspernatur atque vitae iusto ratione nam qui.
		</p>
	</div>
</div>

<style>
	h1 {
		font-size: var(--font-24);
	}

	p {
		color: var(--color-text-muted);
	}

	.container {
		display: grid;
		gap: var(--spacing-8);
		padding: var(--spacing-16);
	}

	.content {
		display: grid;
		gap: var(--spacing-16);
	}
</style>
🐿️ You don’t have to put every page inside a folder. In fact because there are so many files sharing the same name it’s hard to find what you want if you perform a search.
Progressive Enhancement
In this section you’re going to learn how to use Svelte actions to progressively enhance forms.
So far our page works before JavaScript. That’s great but it feels like the 90s. 🤘
I want to use JavaScript when it’s available on the page but I don’t want to do the same work twice.
Actions are functions that let you hook into an element so you have a reference to it and do something when it’s created or destroyed.
If you’re using a third party animation library like GSAP actions are great because in Svelte you want to avoid touching the DOM. You can use actions to make a reusable bounce function you can use on any element with use:bounce that can also accept options.
Let’s pretend that actions don’t exist. In that case we just need to prevent the default behavior of the form and use JavaScript as usual.
I simplified the form inside compose.svelte for this example.
<script lang="ts">
	async function handleSubmit(event: SubmitEvent) {
		const form = event.target as HTMLFormElement

		await fetch('/home', {
			method: 'post',
			headers: { accept: 'application/json' },
			body: new FormData(form)
		})

		form.reset()
	}
</script>

<form
	on:submit|preventDefault={handleSubmit}
	action="/home"
	method="post"
>
	<input
		aria-label="Enter your Tweet"
		name="tweet"
		placeholder="What's your hot take?"
		type="text"
	/>
	<button	type="submit">Tweet</button>
</form>
Remember the work forms do for us? Yeah, that’s what we lost when we decided to use JavaScript for everything when the web platform already does it but now we can have both.
If JavaScript fails the form works but if JavaScript is on the page we’re going to use it instead.
🐿️ This is an example but you would have to refresh the page because Svelte doesn’t know that
tweetsinhome/index.svelteare updated.
This is great but we would have to to do this for every form duplicating the work so this is where actions can help us.
🖌️ Create a form.ts file inside the lib folder.
export const enhance = (form: HTMLFormElement) => {
	async function handleSubmit(event: Event) {
		event.preventDefault()

		const response = await fetch(form.action, {
			method: form.method,
			headers: { accept: 'application/json' },
			body: new FormData(form)
		})

		if (!response.ok) {
			console.error(await response.text())
		}
	}

	form.addEventListener('submit', handleSubmit)

	return {
		destroy() {
			form.removeEventListener('submit', handleSubmit)
		}
	}
}- The form is passed from the action
- We set an event listener
handleSubmitforsubmitusing regular JavaScript and return a cleanup function when the form isdestroyed - Prevent the default behavior of the form
- The form has the
actionandmethodwe can use insidefetch
🖌️ Update compose.svelte to use the action.
<script lang="ts">
	import { enhance } from '$root/lib/form'

	// ...
</script>

<div class="compose">
	<img src="/profile/matia/avatar.webp" alt="Avatar" />
	<form
		action="/home"
		method="post"
		autocomplete="off"
		use:enhance
	>
		<!-- ... -->
	</form>
</div>

<!-- ... -->
If you refresh the page you should see it works but how do you let Svelte know when to update it?
Since we know the URL that changed from form.action we can use invalidate provided by SvelteKit that reruns data fetching on the page and updates what changed.
🖌️ Update form.ts.
import { invalidate } from '$app/navigation'

export const enhance = (form: HTMLFormElement) => {
	async function handleSubmit(event: Event) {
		event.preventDefault()

		const response = await fetch(form.action, {
			method: form.method,
			headers: { accept: 'application/json' },
			body: new FormData(form)
		})

		if (!response.ok) {
			console.error(await response.text())
		}

		// rerun load function
		const url = new URL(form.action)
		url.search = ''
		url.hash = ''
		invalidate(url.href)
	}

	form.addEventListener('submit', handleSubmit)

	return {
		destroy() {
			form.removeEventListener('submit', handleSubmit)
		}
	}
}
Awesome! Everything should work but let’s add a couple more things before we add the action to other forms.
I want to reset the form when the user submits a tweet so I’m going to pass a result function argument that’s going to reset the form inside the action. To avoid other pages like profile redirecting to /home I’m going to use a page store value from SvelteKit instead of form.action but it’s optional.
I tried to make the types more readable compared to the form.ts example in the default SvelteKit project but use their example in a real project because it includes more things such as error handling.
🐿️ In the future this is probably going to be part of SvelteKit so it’s going to be even simpler.
🖌️ This is the final version of form.ts with types.
import { invalidate } from '$app/navigation'
import { page } from '$app/stores'

type Parameters = {
	result?: ({ form }: { form: HTMLFormElement }) => void
}
type Destroy = { destroy: () => void }
type Enhance = (
	form?: HTMLFormElement,
	{ result }?: Parameters
) => Destroy

export const enhance: Enhance = (form, { result } = {}) => {
	let invalidatePath: URL

	page.subscribe((path) => {
		invalidatePath = path.url
	})

	async function handleSubmit(event: Event) {
		event.preventDefault()

		const response = await fetch(form.action, {
			method: form.method,
			headers: { accept: 'application/json' },
			body: new FormData(form)
		})

		if (!response.ok) {
			console.error(await response.text())
		}

		// rerun load function
		const url = new URL(invalidatePath)
		url.search = ''
		url.hash = ''
		invalidate(url.href)

		// reset the form
		if (result) {
			result({ form })
		}
	}

	form.addEventListener('submit', handleSubmit)

	return {
		destroy() {
			form.removeEventListener('submit', handleSubmit)
		}
	}
}
🖌️ Update one line inside compose.svelte.
<!-- ... -->
<form
	action="/home"
	method="post"
	autocomplete="off"
	use:enhance={{ result: ({ form }) => form.reset() }}
>
<!-- ... -->
It might seem like a lot but it’s just one file we can reuse thanks to actions so let’s do that.
🖌️ The only file we need to update is tweet.svelte because we’re reusing it for the user profile and the permalink.
<script lang="ts">
	import { fade, fly } from 'svelte/transition'

	import { enhance } from '$root/lib/form'
	import Icon from '$root/components/icon.svelte'
	import type { TweetType } from '$root/types'

	export let tweet: TweetType
</script>

<article class="tweet-container" transition:fade>
	<a class="avatar" href="/home/profile/{tweet.name}">
		<img
			width="140"
			height="140"
			src={tweet.avatar}
			alt={tweet.name}
		/>
	</a>

	<div class="tweet-details">
		<div>
			<a href="/home/profile/{tweet.name}" class="user">
				{tweet.name}
			</a>
			<span class="handle">{tweet.handle}</span>
			<span class="posted"> · {tweet.posted}</span>
		</div>

		<div class="tweet">
			<div class="content">
				{tweet.content}
			</div>

			<div class="actions">
				<form action="/home/like" method="post" use:enhance>
					<input type="hidden" name="id" value={tweet.id} />
					<button
						class="btn like"
						title="Like"
						type="submit"
					>
						<div class="circle">
							<Icon
								width="24"
								height="24"
								name="like"
								class={tweet.liked ? 'liked' : ''}
							/>
						</div>
						<span class="count">
							{#key tweet.likes}
								{#if tweet.likes}
									<div
										in:fly={{ y: 40 }}
										out:fly={{ y: 40 }}
									>
										{tweet.likes}
									</div>
								{/if}
							{/key}
						</span>
					</button>
				</form>

				<a
					href="/home/profile/{tweet.name}/status/{tweet.url}"
					class="permalink"
					title="Permalink"
				>
					<div class="circle">
						<Icon width="24" height="24" name="permalink" />
					</div>
				</a>

				<form
					action="/home?_method=delete"
					method="post"
					use:enhance
				>
					<input type="hidden" name="id" value={tweet.id} />
					<button
						aria-label="Remove tweet"
						class="btn remove"
						title="Remove"
						type="submit"
					>
						<div class="circle">
							<Icon width="24" height="24" name="remove" />
						</div>
					</button>
				</form>
			</div>
		</div>
	</div>
</article>

<!-- ... -->
Try it out! 💪
Prefetching
Wouldn’t it be awesome if you could preload data for a page before someone visits it? 😔
You can? 😯 That’s right. You can use sveltekit:prefetch on your links to start loading data when the user hovers over a link.
This is another benefit of code splitting because every route has its own data and styles.
🖌️ Let’s change navigation.svelte to take advantage of prefetching.
<!-- ... -->

<aside>
	<div class="container">
		<nav>
			<ul>
				<li>
					<a href="/" class="logo">🐦️</a>
				</li>
				<li class:active={path === '/home'}>
					<a href="/home" sveltekit:prefetch>
						<!-- ... -->
					</a>
				</li>
				<li class:active={path === '/home/profile/matia'}>
					<a href="/home/profile/matia" sveltekit:prefetch>
						<!-- ... -->
					</a>
				</li>
				<li class:active={path === '/home/settings'}>
					<a href="/home/settings" sveltekit:prefetch>
						<!-- ... -->
					</a>
				</li>
				<li class:active={path === '/home/about'}>
					<a href="/home/about" sveltekit:prefetch>
						<!-- ... -->
					</a>
				</li>
			</ul>
		</nav>

		<button class="btn tweet">Tweet</button>
	</div>
</aside>

<!-- ... -->
Open the network tab inside your developer tools and look what happens when you hover over the links in the navigation. 😄
Page Transitions
It would be sweet if we had some page transitions for the main content but we don’t want to animate the navigation and sidebar since that content doesn’t change.
You’re going to create a <Transition> component that’s going to wrap the <slot> inside home/__layout.svelte.
One thing we need to know is when the URL changes so we can use the page store value from Svelte to pass as a prop to the <Transition> component which has a key block that is going to destroy and recreate the content when the URL changes.
🐿️ You already used key block for liking the tweet so it plays the animation if you haven’t noticed.
🖌️ Create the transition.svelte component inside components.
<script lang="ts">
	import { fly } from 'svelte/transition'

	export let url: URL
</script>

{#key url}
	<div
		in:fly={{ y: -50, duration: 250, delay: 300 }}
		out:fly={{ y: -50, duration: 250 }}
	>
		<slot />
	</div>
{/key}
🐿️ The 300ms delay is because we need to wait out the 250ms duration of the animation so it doesn’t overlap when the new one starts.
🖌️ Update __layout.svelte inside home.
<script lang="ts">
	import { page } from '$app/stores'

	import Navigation from '$root/components/navigation.svelte'
	import Trending from '$root/components/trending.svelte'
	import Transition from '$root/components/transition.svelte'
</script>

<div class="container">
	<Navigation />
	<main class="feed">
		<Transition url={$page.url}>
			<slot />
		</Transition>
	</main>
	<Trending />
</div>

<!-- ... -->
Don’t forget we have a transition for the landing page which also has a delay to compensate for this.
Try it out! Whimsy. 😍🪄
Cleaning Up Endpoints
This part is optional.
Our endpoints work great but we have some repeating code and it would be nice to clean everything up.
The file is going to contain all our endpoint functions so just copy it over.
🖌️ Create a prisma.ts helper file inside utils.
prisma.ts
import prisma from '$root/lib/prisma'
import { timePosted } from '$root/utils/date'

export async function getTweets() {
	const tweets = await prisma.tweet.findMany({
		include: { user: true },
		orderBy: { posted: 'desc' }
	})

	const likedTweets = await getLikedTweets()

	return tweets.map((tweet) => {
		return {
			id: tweet.id,
			content: tweet.content,
			likes: tweet.likes,
			posted: timePosted(tweet.posted),
			url: tweet.url,
			avatar: tweet.user.avatar,
			handle: tweet.user.handle,
			name: tweet.user.name,
			liked: likedTweets.includes(tweet.id)
		}
	})
}

export async function getTweet(
	params: Record<string, string>
) {
	const tweet = await prisma.tweet.findFirst({
		where: { url: params.tweetId },
		include: { user: true }
	})

	const likedTweets = await getLikedTweets()

	return {
		id: tweet.id,
		content: tweet.content,
		likes: tweet.likes,
		posted: timePosted(tweet.posted),
		url: tweet.url,
		avatar: tweet.user.avatar,
		handle: tweet.user.handle,
		name: tweet.user.name,
		liked: likedTweets.includes(tweet.id)
	}
}

export async function getLikedTweets() {
	const liked = await prisma.liked.findMany({
		where: { userId: 1 },
		select: { tweetId: true }
	})

	const likedTweets = Object.keys(liked).map(
		(key) => liked[key].tweetId
	)

	return likedTweets
}

export async function createTweet(request: Request) {
	const form = await request.formData()
	const tweet = String(form.get('tweet'))

	if (tweet.length > 140) {
		return {
			status: 400,
			body: 'Maximum Tweet length exceeded.',
			headers: { location: '/home' }
		}
	}

	// you can get the user from the session
	await prisma.tweet.create({
		data: {
			posted: new Date(),
			url: Math.random().toString(16).slice(2),
			content: tweet,
			likes: 0,
			user: { connect: { id: 1 } }
		}
	})
}

export async function removeTweet(request: Request) {
	const form = await request.formData()
	const tweetId = +form.get('id')
	await prisma.tweet.delete({ where: { id: tweetId } })
}

export async function likeTweet(request: Request) {
	const form = await request.formData()
	const id = +form.get('id')

	// verify if tweet is already liked
	const liked = await prisma.liked.count({
		where: { tweetId: id }
	})

	if (liked === 1) {
		// if tweet is already liked unlike it
		await prisma.liked.delete({ where: { tweetId: id } })

		// update the likes count
		const count = await prisma.tweet.findUnique({
			where: { id },
			select: { likes: true }
		})

		await prisma.tweet.update({
			where: { id },
			data: { likes: (count.likes -= 1) }
		})

		return {
			status: 303,
			headers: {
				location: '/home'
			}
		}
	}

	// add liked record
	await prisma.liked.create({
		data: {
			tweetId: id,
			user: { connect: { id: 1 } }
		}
	})

	// get the current like count and update it
	const count = await prisma.tweet.findUnique({
		where: { id },
		select: { likes: true }
	})

	await prisma.tweet.update({
		where: { id },
		data: { likes: (count.likes += 1) }
	})
}

export async function getUserProfile(
	params: Record<string, string>
) {
	const profile = await prisma.user.findFirst({
		where: { name: params.user }
	})

	const tweets = await prisma.tweet.findMany({
		where: { user: { id: 1 } },
		include: { user: true },
		orderBy: { posted: 'desc' }
	})

	const likedTweets = await getLikedTweets()

	if (!profile || !tweets || tweets.length === 0) {
		return { status: 404 }
	}

	const userTweets = tweets.map((tweet) => {
		return {
			id: tweet.id,
			content: tweet.content,
			likes: tweet.likes,
			posted: timePosted(tweet.posted),
			url: tweet.url,
			avatar: tweet.user.avatar,
			handle: tweet.user.handle,
			name: tweet.user.name,
			liked: likedTweets.includes(tweet.id)
		}
	})

	return { profile, tweets: userTweets }
}
🖌️ After the refactor update the endpoints.
routes/home/index.ts
import type { RequestHandler } from '@sveltejs/kit'

import {
	createTweet,
	getTweets,
	removeTweet
} from '$root/utils/prisma'

export const GET: RequestHandler = async () => {
	const tweets = await getTweets()

	if (!tweets) {
		return { status: 400 }
	}

	return {
		headers: { 'Content-Type': 'application/json' },
		status: 200,
		body: { tweets }
	}
}

export const POST: RequestHandler = async ({ request }) => {
	await createTweet(request)

	return {}
}

export const DELETE: RequestHandler = async ({ request }) => {
	await removeTweet(request)

	return {
		status: 303,
		headers: { location: '/home' }
	}
}
routes/home/like.ts
import type { RequestHandler } from '@sveltejs/kit'

import { likeTweet } from '$root/utils/prisma'

export const POST: RequestHandler = async ({ request }) => {
	await likeTweet(request)

	return {
		status: 303,
		headers: {
			location: '/home'
		}
	}
}
home/profile/[user].ts
import type { RequestHandler } from '@sveltejs/kit'
import { getUserProfile } from '$root/utils/prisma'

export const GET: RequestHandler = async ({ params }) => {
	const { profile, tweets } = await getUserProfile(params)

	return {
		headers: { 'Content-Type': 'application/json' },
		status: 200,
		body: { profile, tweets }
	}
}
home/profile/[user]/status/[tweetId]/index.ts
import type { RequestHandler } from '@sveltejs/kit'

import { getTweet } from '$root/utils/prisma'

export const GET: RequestHandler = async ({ params }) => {
	const tweet = await getTweet(params)

	if (!tweet) {
		return { status: 400 }
	}

	return {
		status: 200,
		body: { tweet }
	}
}
That already looks a lot cleaner! 🧹
Conclusion
Congrats! 🥳
That was a long one. Hope you learned and feel empowered to build something. You created a full stack app without knowing backend, databases or having to use SQL.
You can deploy this project in a Node.js environment or if you use a hosted SQL database you can easily deploy to Vercel just by pointing it at your repository but don’t forget to enter your environment variables.
There’s a lot more to learn about SvelteKit so hit the documentation or watch some videos. 🍿
You have to practice so pick a project you’re interested in and get comfy reading the documentation and asking questions in the Svelte discord.
Thanks for reading! 🏄️