Create a JavaScript Code Sandbox
Published Sep 15, 2021
Table of Contents
- Introduction
- What’s an Iframe?
- Project Setup
- Hooking Up The DOM
- Updating the User Interface
- Adding Event Listeners
- Showing Output
- Showing Errors
- Using the Monaco Editor
- Conclusion
Introduction
If you ever used Codepen, JSFiddle, or CodeSandbox you’re familiar with what a code sandbox is.
Creating a code sandbox is surprisingly simple to make yourself, and fun to extend.
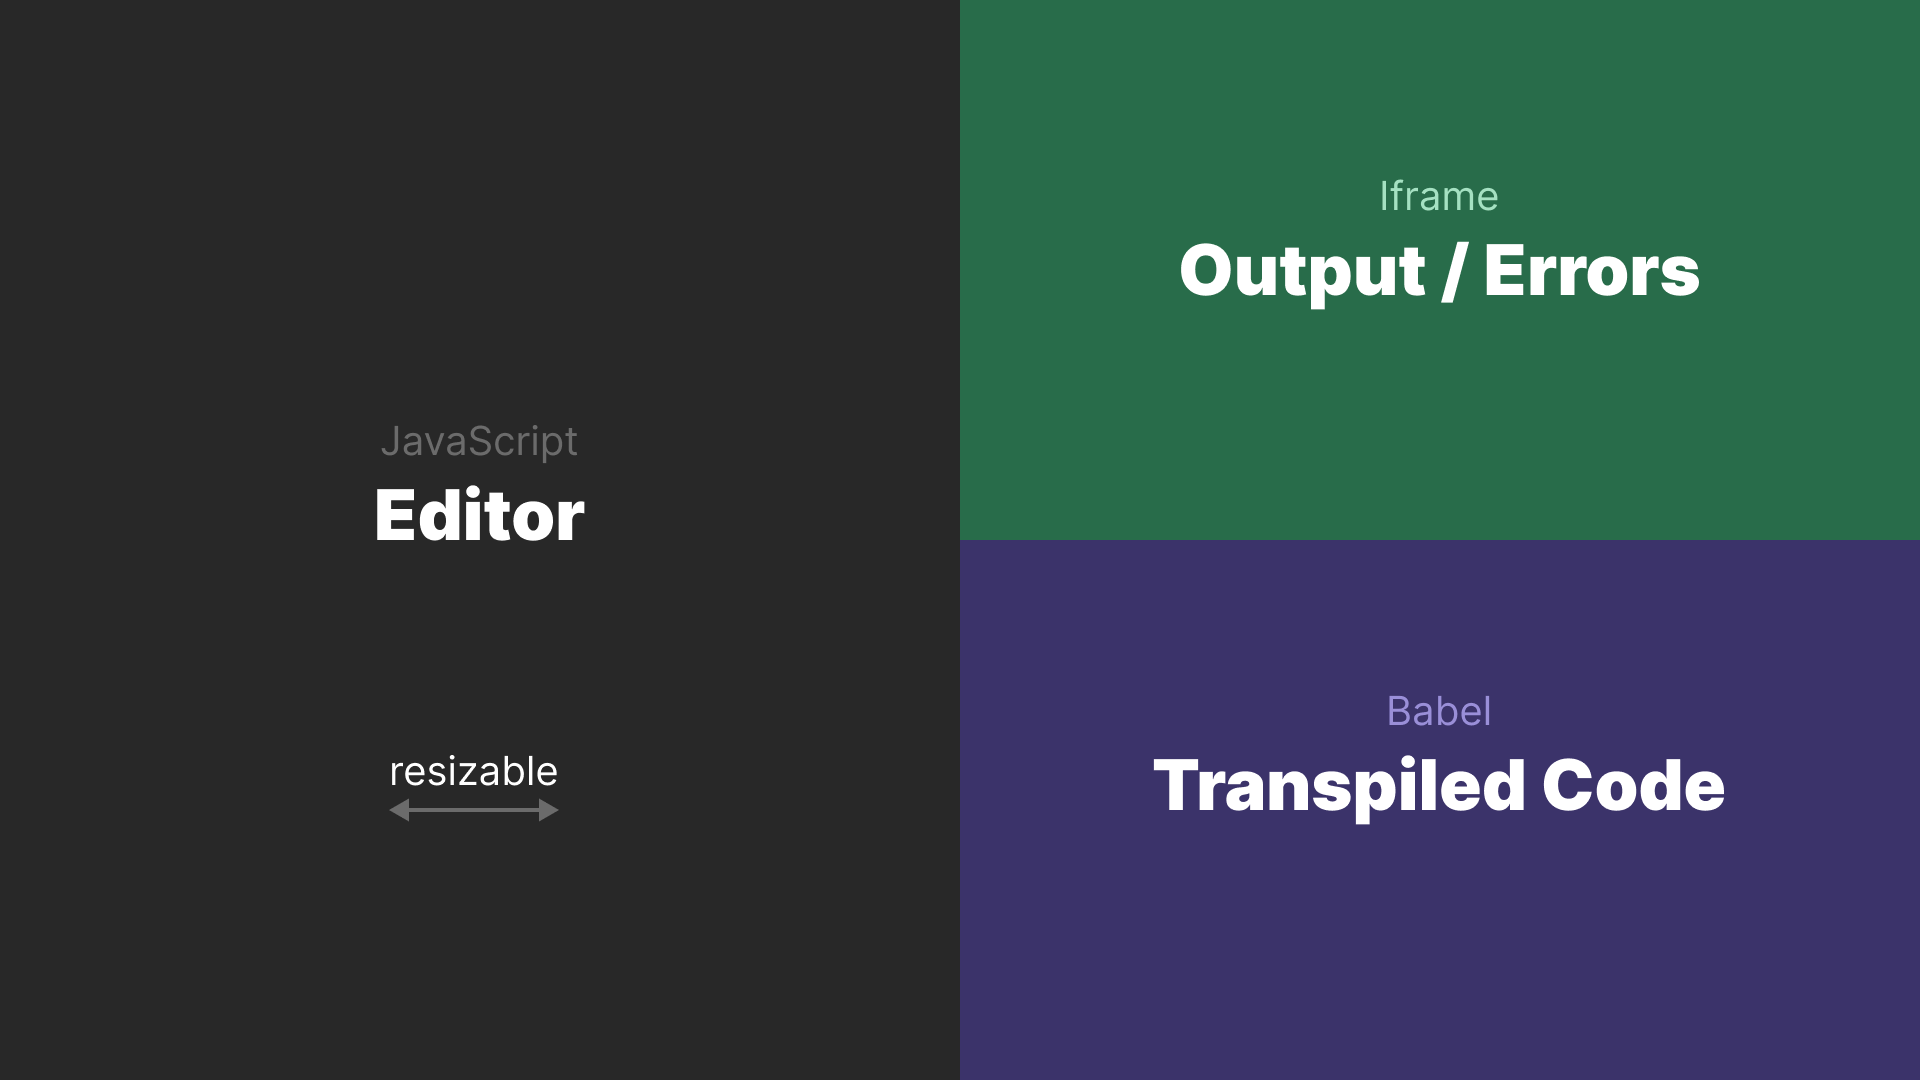
You can create a simple CodePen if you want with the knowledge you learn, but I want to create a more educational code sandbox as a learning tool that’s able to:
- Load npm packages from a URL using Skypack
- Render HTML to an
<iframe> - Display error messages from the console
- Show the transpiled output of Babel to be able to see the JavaScript created under the hood when using React, or transpiling newer to older versions of JavaScript
I want to start simple from a <textarea> to adding the Monaco Editor that powers Visual Studio Code at the end.
We’re going to use the build tool Vite with TypeScript to get a nice development environment. It’s alright if you don’t know TypeScript because you can just ignore the types, and keep the filename as *.js. Everything is going to work the same — I just like using TypeScript.
You can visit the JavaScript Sandbox above, and get the starter and finished project files on GitHub.
What’s an Iframe?
Let’s start by playing detective 🔎, and examining CodePen source code through the lens of our developer tools. This part is optional, as I only want to share my thought process with you.
If you’re in a new pen on CodePen, press Ctrl + Shift + I to bring up the developers tools. Notice something interesting by inspecting the right-hand column. It’s an iframe. You can imagine an <iframe> as a separate page inside another page. By definition “it’s a nested browsing context, embedding another HTML page into the current one.”
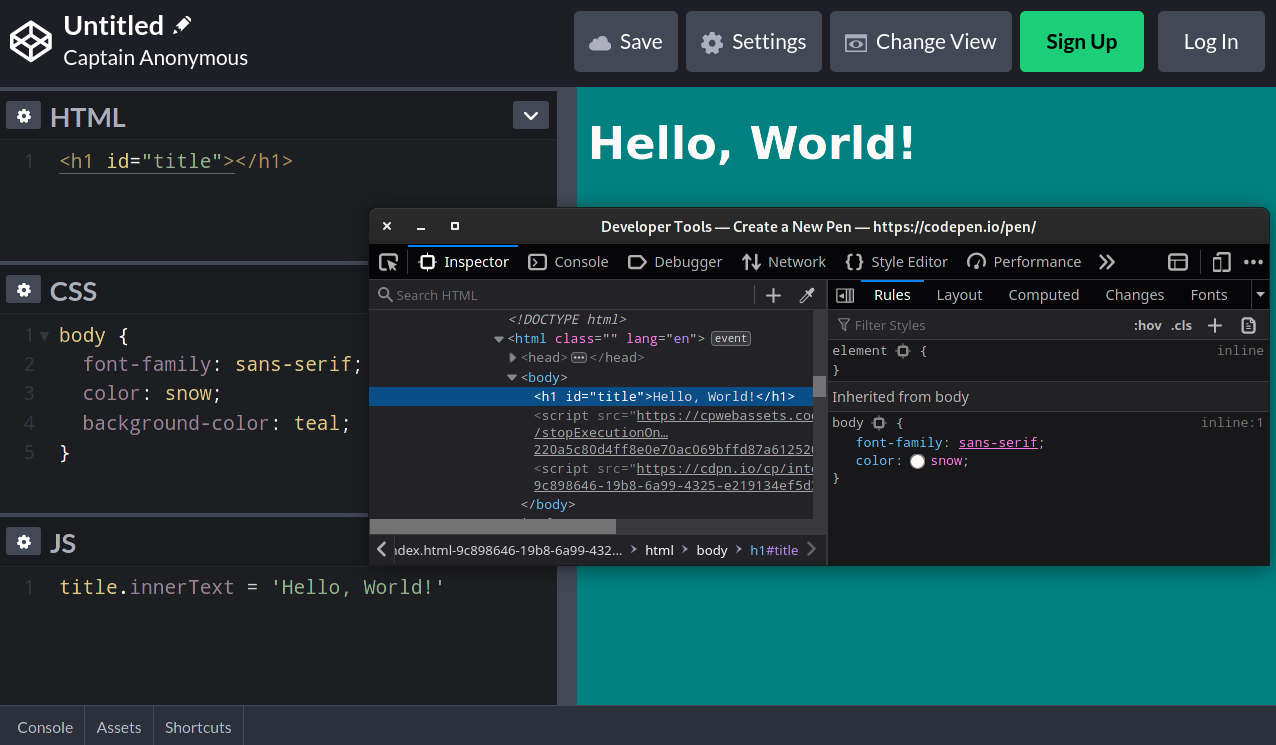
An <iframe> behaves just like a regular page, but contained into it’s own microcosm. This sounds like the perfect spot for a sandbox. We can already make a couple of observations:
- The
<iframe>behaves just like a regular page - User inputs something on the left side (regular page)
- Output displays on in the
<iframe>the right - We can execute JavaScript
These online editors are just using a fancy <textarea> that does syntax highlighting, and code completion among other things. CodePen uses CodeMirror. CodeSandbox on the other hand is a lot more involved, and it’s basically an integrated development environment (IDE) inside your browser using the Monaco Editor just like VS Code.
Project Setup
Create a project using Vite. Confirm, and name your project from the questions it asks you. From the framework options select vanilla, and pick vanilla-ts, or vanilla if you don’t want to use TypeScript.
npm init vite@latestInstall npm dependencies with npm i, and start the development server with npm run dev. Open http://localhost:3000/.
You can also just use the starter project files that include the styles we’re going to need.
git clone https://github.com/joysofcode/javascript-sandbox.gitThis is the project structure you should end up with at the end. There’s more files as placeholders we’re going to work in.
├─ public/
│  ├─ iframe.css
│  ├─ image.gif
├─ src/
│  ├─ lib/
│  ├─ styles/
│  │  ├─ style.css
│  ├─ types/
│  │  ├─ index.ts
│  ├─ utils/
│  ├─ main.ts
│  ├─ vite-env.d.ts
.gitignore
favicon.svg
index.html
package.json
tsconfig.json
Hooking Up The DOM
Inside index.html the only interesting thing to focus on is our page markup.
<div class="loading" data-loading>
  <div class="loader"></div>
  <h1>Loading Sandbox</h1>
</div>

<section class="code">
  <textarea class="editor" spellcheck="false" data-editor></textarea>
</section>

<section class="result">
  <div class="output">
    <iframe data-iframe></iframe>
    <div class="errors" data-errors></div>
  </div>
  <div class="source" data-source></div>
</section>
I prefer to use class for styling, and global data-* attributes to hook into with JavaScript because class names could always change.
There’s only two sections, the left-hand side for the editor, and right-hand side for the output and errors. We’re going to use a simple show and hide to only show the <iframe> if there are no errors, and vice versa.
We’re going to start with a simple <textarea> for the editor, and disable spellcheck because we don’t want it.
Let’s create some useful helpers in utils such as getElement to let us query the DOM easier, and export the elements, so they’re easier to use. Let’s also add the showIframe, and showErrors functions.
export function getElement(targetElement: string): HTMLElement {
  const element = document.querySelector(targetElement)

  if (!element) {
    throw new Error(`Element '${targetElement}' doesn't exist.`)
  }

  return element as HTMLElement
}

export function showIframe(): void {
  elements.iframe.style.display = 'block'
  elements.errors.style.display = 'none'
}

export function showError(): void {
  elements.iframe.style.display = 'none'
  elements.errors.style.display = 'block'
}

export const elements = {
  iframe: getElement('[data-iframe]') as HTMLIFrameElement,
  errors: getElement('[data-errors]') as HTMLDivElement,
  editor: getElement('[data-editor]') as HTMLDivElement,
  source: getElement('[data-source]') as HTMLDivElement,
  loading: getElement('[data-loading]') as HTMLDivElement,
}
Using an element is going to be less error prone using elements.element with the help of code completion.
Updating the User Interface
Using state is going to make it simple to update the user interface, reduce errors, and impossible states (for simplicity we’re just using global variables).
import { elements, showError, showIframe } from './utils/dom'

import type { ErrorMessageType, StateType } from './types'

let state: StateType = 'editing'
let errorMessage: ErrorMessageType = ''

function updateUI(): void {
  if (state === 'editing') {
    // ...
    return
  }

  if (state === 'error') {
    // ...
    return
  }

  throw new Error(`State ${state} should not be possible. 💥`)
}
We’re always going to know what state the application is thanks to state. Once we set state to editing we can update the user interface with updateUI.
If you want to learn TypeScript I have an entire TypeScript Fundamentals post. 😎
You can look at the src/types/index.ts types if you’re curious. If you don’t care about TypeScript just ignore types completely.
export type StateType = 'editing' | 'error'
export type ErrorMessageType = string

export interface TranspiledCodeType {
  iframeCode: string
  sourceCode: string
}
You could also use an enum for state, or if using JavaScript a regular object.
// index.ts
export enum State {
  Editing = 'editing',
  Error = 'error'
}

// main.ts
import { State } from './types'
let state = State.Editing
Adding Event Listeners
Let’s make sure we update the user interface when you type something inside the editor.
elements.editor.addEventListener('keyup', updateUI)We don’t want to instantly update the user interface because it would be annoying for the user to instantly get an error on the screen as they type. Instead we’re going to wrap updateUI with a debounce function that’s going to wait at least 500 ms, or 0.5 seconds before updating the user interface.
export function debounce(callback: () => void, delay = 500): () => void {
  let timerId: NodeJS.Timeout

  return () => {
    clearTimeout(timerId)
    timerId = setTimeout(callback, delay)
  }
}
The debounce function accepts a callback function it executes inside setTimeout, and a delay with a default value of 500 ms. The reason it returns a function is because of closures, which creates a new environment each time that cancels the last request out. If we just used setTimeout, it would stack them on top of each other.
import { debounce } from './utils/helpers'

elements.editor.addEventListener('keyup', debounce(updateUI))
We’re also going to add an event listener to listen for errors on the page. This is going to let us update state, set the errorMessage, and update the user interface.
window.addEventListener('error', ({ error }: ErrorEvent) => {
  state = 'error'
  errorMessage = error.message
  updateUI()

  // if there is no longer an `error` on the page
  state = 'editing'
})
error is destructured from event.error that has a couple of properties but we’re only interested in error.message, so we use it to set errorMessage.
If there are no errors on the page it won’t run again, so the state is going to be set to editing.
There’s also a loading indicator inside index.html that gets removed after the page loads. We already have a reference to loading inside src/utils/dom.ts.
window.addEventListener('load', () => elements.loading.remove())Showing Output
We need to update the contents of the <iframe>, and show the transpiled code inside output each time updateUI runs among other things:
- Show the
<iframe>ifstate === 'editing' - Get the value of
<textarea>on each update - Create a
transpileCodefunction to transpile the code using Babel that returnsiframeCode, andsourceCodewe can pass to their respectiveupdateIframe, andupdateSourcefunctions
function updateUI(): void {
  if (state === 'editing') {
    showIframe()
    const code = elements.editor.value
    const { iframeCode, sourceCode } = transpileCode(code)
    updateIframe(iframeCode)
    updateSource(sourceCode)
    return
  }

  if (state === 'error') {
    // ...
    return
  }

  throw new Error(`State ${state} should not be possible. 💥`)
}
Let’s create the transpileCode function first, and explain how that works. Before we do that we have to install @babel/standalone, so we can use Babel client-side because we’re not using a server.
npm i @babel/standaloneAfter you have done that we can import transform from @babel/standalone.
import { transform } from '@babel/standalone'
import { importsRegex, pureRegex, replace } from './utils/format'

import type { ErrorMessageType, StateType, TranspiledCodeType } from './types'

function transpileCode(code: string): TranspiledCodeType {
  // ignore imports so Babel doesn't transpile it
  const codeToTranspile = replace(code, importsRegex)
  // the magic sauce used to transpile the code
  const options = { presets: ['es2015-loose', 'react'] }
  const { code: transpiledCode } = transform(codeToTranspile, options)

  if (!transpiledCode) {
    // syntax errors get caught by the `error` listener
    throw new Error(`Something went wrong transpiling ${codeToTranspile}.`)
  }

  const hasImports = Boolean(code.match(importsRegex))
  const imports = code.match(importsRegex)?.join('\n') ?? ''

  return {
    // this is passed to `updateIframe`
    iframeCode: hasImports ? `${imports}\n${transpiledCode}` : transpiledCode,
    // this is passed to `updateSource`
    // ignore /*#__PURE__*/ from transpiled output to reduce noise
    sourceCode: replace(transpiledCode, pureRegex),
  }
}
Let’s break down what’s going on:
- The
transpileCodefunctions takes astringthat’s our input - Inside
codeToTranspilewe remove imports, for exampleimport React from 'https://cdn.skypack.dev/react'because Babel would transpile it - We set Babel options to use the es2015-loose (it transpiles ES6 to ES5 in a way that’s more readable), and react preset so it understands JSX
- We pass those parameters to Babel
transform, and destructurecodefrom the result that we rename totranspiledCode - If for some reason
transpiledCodedoesn’t return anything, we raise an error hasImportschecks if there are imports, andimportsfind the imports that returns an array so we usejointo return a string and separate each import by a new line, or set it to an empty string as fallback- In the return we set
iframeCodeto includeimportsandtranspiledCodeif there are imports, or just the transpiledCode if there are none - For
sourceCodewe replace/*#__PURE__*/string generated by Babel to make the output more readable
The format.ts utils is nothing special — just some regex to match imports, the string we want to remove, and a replace function to save on typing.
export const importsRegex = /import(?:["'\s]*([\w*{}\n\r\t, ]+)from\s*)?["'\s].*([@\w/_-]+)["'\s].*/g
export const pureRegex = /\/\*#__PURE__\*\//g

export function replace(string: string, regex: RegExp, value = ''): string {
  return string.replace(regex, value).trim()
}
To learn about how Babel works I read the Babel documentation and played around in their REPL to figure out what preset I wanted.
If you’re following along I highly recommend you get the Inline HTML extension for VS Code because it gives us syntax highlight and code completion for template strings. You can read Syntax Highlight Inside ES6 Template Strings to learn how it’s useful.
We need to create the updateIframe, and updateSource functions.
function updateIframe(code: string): void {
  const source = /* html */ `
    <html>
    <head>
      <link rel="stylesheet" href="/iframe.css">
    </head>
    <body>
      <div id="app"></div>
      <script type="module">${code}</script>
    </body>
    </html>
  `
  elements.iframe.srcdoc = source
}
Don’t forget we have to invoke updateUI to render the user interface. If you’re coding along temporarily comment out updateSource to see the result.
updateUI()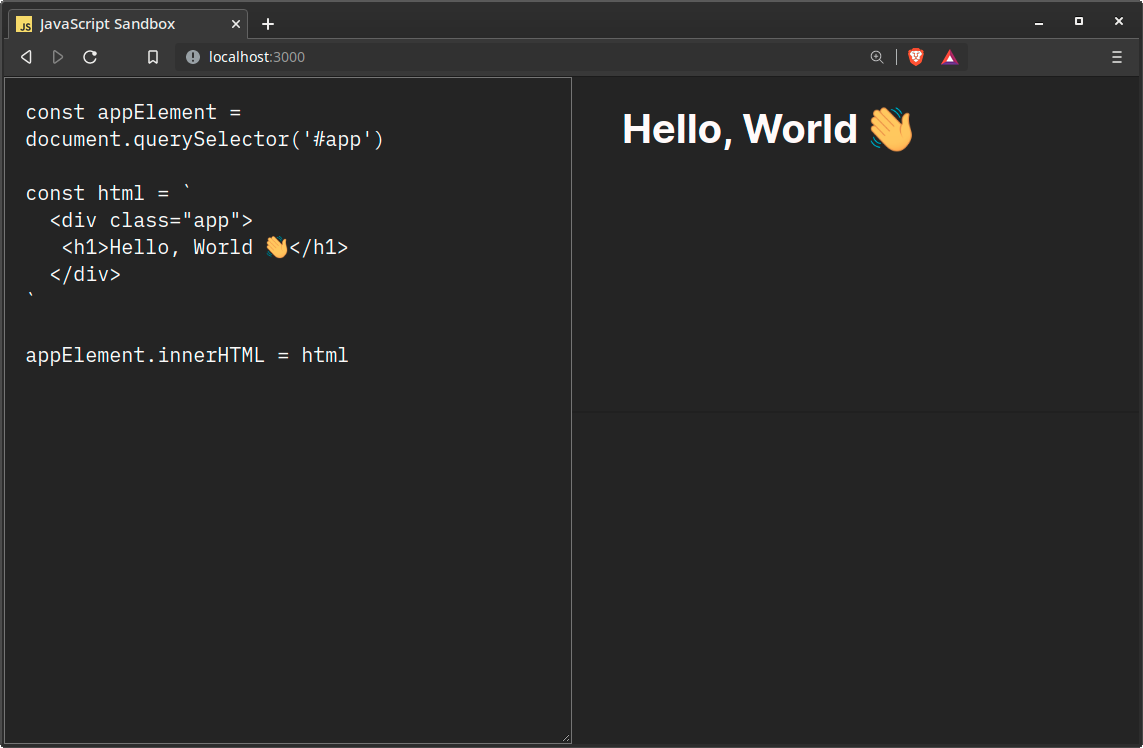
In updateFrame we just create a template string and replace the srcdoc which is the entire HTML document of the <iframe> each update. The CSS is linked from the public folder because Vite uses it for static assets, so we can access it even when deployed. It has an id attribute of app like most frameworks use. The code is inside <script> that’s a module, so we can use ES modules. Using module we also don’t have to use defer, so the script executes after the DOM has loaded.
function updateSource(transpiledOutput: string): void {
  const sourceHTML = /* html */ `
    <h3>📜 Source</h3>
    <xmp>${transpiledOutput}</xmp>
  `
  elements.source.innerHTML = sourceHTML
}
For updateSource we just set the innerHTML for source. The only interesting thing here is the <xmp> element that’s like the <pre> element but doesn’t interpret HTML. This isn’t ideal because it’s deprecated, but it’s a great solution because we don’t have to think about escaping the HTML characters. You can reach for a package that does that, or write your own solution.
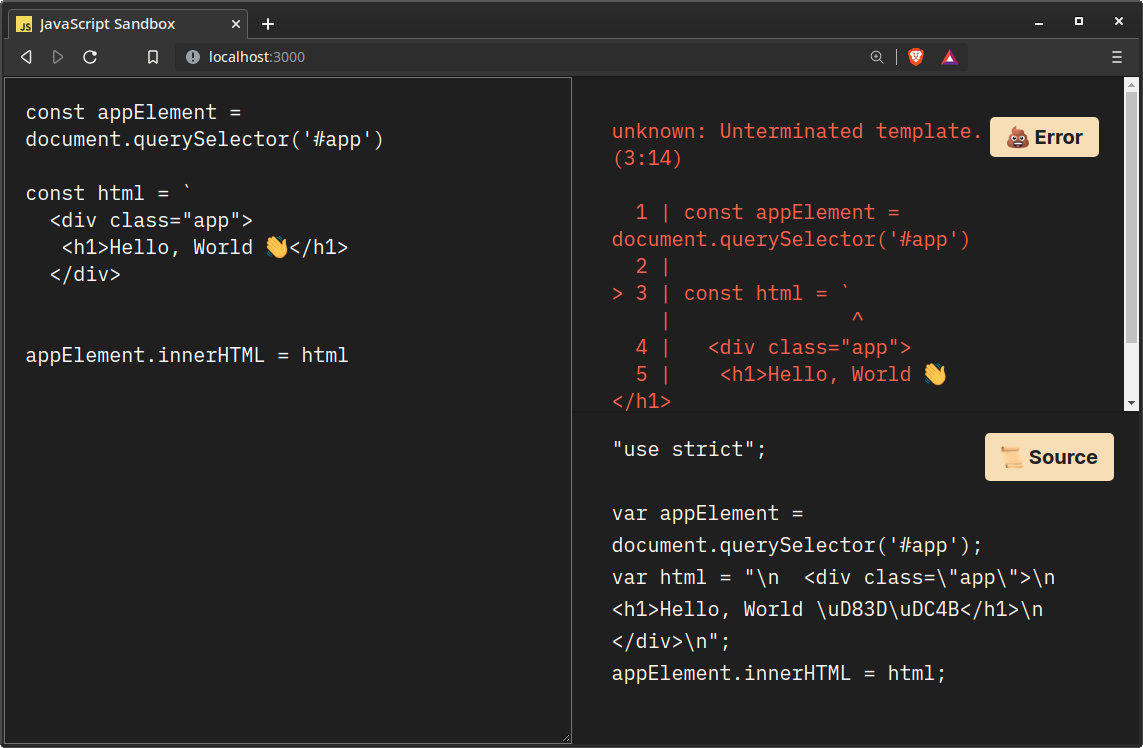
Showing Errors
We already set up the event listener earlier to listen for errors, so the only thing left to do is to update the updateUI function.
function updateUI(): void {
  // ...

  if (state === 'error') {
    showError()
    logError(errorMessage)
    return
  }

  throw new Error(`State ${state} should not be possible. 💥`)
}
logError is going to look exactly like updateSource.
function logError(error: string): void {
  const errorHtml = /* html */ `
    <h3>💩 Error</h3>
    <xmp>${error}</xmp>
  `
  elements.errors.innerHTML = errorHtml
}
That’s it for the code sandbox part. It’s not that complicated. 😄
Using the Monaco Editor
Integrating the Monaco Editor might be simpler than you think.
We’re going to use vite-plugin-monaco-editor that uses monaco-editor but makes it easier because we have to write less code like defining service workers, and it uses esbuild for quick builds.
There’s around 800 modules if we use the entire Monaco Editor library, so that’s a lot to go through using just a JavaScript bundler. esbuild is a JavaScript bundler written in Go which is a lot faster at those types of tasks.
Inside the Monaco Editor GitHub repository there are examples of how to integrate it using different methods. We’re only interested in Integrate the ESM version that has steps for Webpack, Parcel, and Vite. If you look at Using Vite you can see it’s nothing complicated, but using the plugin is even simpler.
If you’re interested in even more examples of using the Monaco Editor such as using Electron, there’s a monaco-editor-samples repository.
Let’s replace the <textarea> inside index.html.
<section class="code">
  <div class="editor" data-editor></div>
</section>
Your package.json should already include vite-plugin-monaco-editor as a development dependency, but you can always install it with npm i -D vite-plugin-monaco-editor.
To use the plugin we have to update the Vite config in the root of your project, so create it.
import { defineConfig } from 'vite'
import monacoEditorPlugin from 'vite-plugin-monaco-editor'

export default defineConfig({
  plugins: [
    monacoEditorPlugin({
      languageWorkers: ['editorWorkerService', 'typescript'],
    }),
  ],
})
In the final version I’m reducing the bundle size by only importing features we’re using. The only service workers we need is for the editor, and TypeScript. You have to include TypeScript, because it shares the same service worker with JavaScript. You can always read the documentation to learn more.
Service workers let you do tasks in the background (it’s like using multiple threads), so it doesn’t freeze the user interface. Monaco Editor uses service workers for all features of the editor.
Inside lib/monaco/ we’re going to add monacoEditor.ts.
import * as monaco from 'monaco-editor/esm/vs/editor/editor.api'
import 'monaco-editor/esm/vs/editor/contrib/inlineCompletions/ghostTextController.js'
import 'monaco-editor/esm/vs/basic-languages/javascript/javascript.contribution'
import 'monaco-editor/esm/vs/language/typescript/monaco.contribution'

import { elements } from '../../utils/dom'

const editorCode = /* html */ `
import React, { useEffect } from 'https://cdn.skypack.dev/react'
import { render } from 'https://cdn.skypack.dev/react-dom'

import confetti from 'https://cdn.skypack.dev/canvas-confetti'

function App() {
  useEffect(() => confetti(), [])

  return (
    <div className="app">
      <h1>JavaScript Sandbox</h1>
      <p>
        You can use NPM packages provided by {''}
        <a href="https://www.skypack.dev/">Skypack</a>.
      </p>
      <img src="/image.gif" />
    </div>
  )
}

render(
  <App />,
  document.getElementById('app')
)`.trim()

const editorOptions = {
  value: editorCode,
  language: 'javascript',
  theme: 'vs-dark',
  automaticLayout: true,
  minimap: {
    enabled: false,
  },
  fontFamily: 'IBM Plex Mono, monospace',
  fontSize: 16,
  tabSize: 2,
}

const monacoEditor = monaco.editor.create(elements.editor, editorOptions)
export { monacoEditor as default }
We’re doing the same here by only importing features we’re using such as code completion, JavaScript support, and again we have to include TypeScript also.
I figured this out through trial and error by spelunking inside node_modules because I already knew you could import only what you require from the plugin documentation.
If you don’t care about this, you can just say import * as monaco from 'monaco-editor'. The import * as monaco part is because there’s no default export, the Monaco Editor just imports a bunch of things we can use.
We’re using React code as the default example to show Babel, and ES modules working. You could try any other JavaScript framework such as Vue if it can work with ES modules. I even managed to make Svelte work (without single file components since there’s no compiler).
Inside editorOptions we can set the language, and theme among other things. automaticLayout checks if the editor is resized to adjust the size.
You can read the Monaco Editor API to learn what’s possible but it might take you a while to figure things out through search and asking questions since it’s confusing.
Lastly we create the Monaco Editor, and export it as monacoEditor that has a getValue method to get the contents.
import monacoEditor from './lib/monaco/monacoEditor'

function updateUI(): void {
  if (state === 'editing') {
    // ...
    const code = monacoEditor.getValue()
    // ...
  }

  // ...
}
Congratulations! 🥳
Conclusion
Hope you learned something, and changed the code to work how you want. Here’s what you can do next if you’re interested:
- Let the user enter HTML, CSS, and JavaScript like CodePen
- Have the ability to use multiple files (you can look up how it’s done using the Monaco Editor)
- Persist code by using local storage (save the input to local storage, and check if it exists on page load to set the contents of the editor)
- Use a framework
Thanks for reading! 🏄♀️